
One of the most fundamental features of any course is the ability to offer students specific office hours where they can sign up for additional help from their instructor and or from any teaching assistants. Thankfully, there is a Moodle plugin which provide this Signup Sheet function to allow students to create online appointments.
Go to this page to download the latest version of the Signup Sheets plugin (which is also called tutorial booking):
https://moodle.org/plugins/mod_tutorialbooking
Then install it with the Moodle Installer. The installation ends at the Signup Sheet New Settings screen. Change the number of participants from 30 to 4. Change live service emails from No to Yes. Then click Save changes. Skip the Notification screen. Click My Courses and then the template course.
Maximum course size of 12 students.
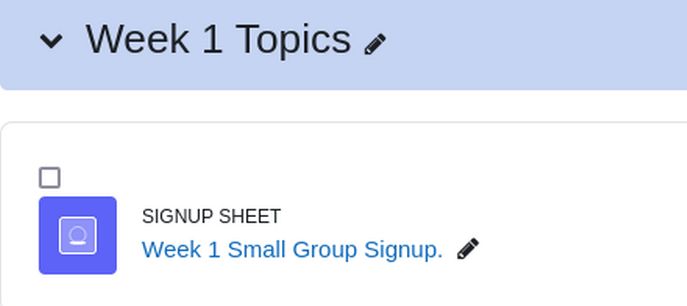
Click on Week 1 Add Activity to add the Signup Sheet activity to that week. Wed, Thurs Fri 10 to 11 am
Calculating the Number small group appointments needed and the number of students per small group appointments
The purpose of the 1 hour small group video conference appointments is to help students complete their 4 weekly projects and prepare for their 4 weekly quizzes. Assuming you are teaching a full load of four 4 credit classes (two on Monday -Wednesday and two on Tuesday Thursday) with 12 students per course, you might have a maximum of 48 students.
With a maximum of 4 students per small group and each group meeting for 60 minutes, you will need 12 small group sessions. We will set up our template course for Course 1 small group appointments and then change the descriptions for the other three courses when we make them from the course template.
Here is the Name and Description for the template and for Course 1:
For Name, type Week 1 Small Group Signup. For Description, type Choose a 60 minute time slot from the open options. Note that Course 1 Small Group options (limit 4 students per group) are either Wednesday, Thursday or Friday 10 to 11 am.
Here is the description for Course 2 Small Group options: Choose a 60 minute time slot from the open options. Note that Course 2 Small Group options (limit 4 students per group) are either Wednesday, Thursday or Friday 11 am to Noon.
Here is the description for Course 3 Small Group options: Choose a 60 minute time slot from the open options. Note that Course 3 Small Group options (limit 4 students per group) are either Wednesday, Thursday or Friday Noon to 1 pm.
Here is the description for Course 4 Small Group options: Choose a 60 minute time slot from the open options. Note that Course 4 Small Group options (limit 6 students per group) are either Wednesday, Thursday or Friday 1 to 2 pm.
Leave Locked at No. Change Privacy to Users can only see their signup. Then click Save and Return to Course.
Click the Week 1 Small Group Signup to edit it. We need to create three small group sessions for Course 1. Click Add new session.
For title, type: Course 1 Week 1 Session 1
For Details, type:
This session meets on Wednesday from 10 to 11 am. Space is limited to 4 students per session. If this session is full, please choose the other session. The location is a Jitsi video conference link for Course-1-Week-1: For example: https://meet.jit.si/Course-1-Week-1
If you have any questions or if you schedule only permits you to attend a particular small group session, contact the course instructor. My email is davidspring at protonmail dot com.
Click Save. Then click Add a New session.
For title, type: Course 1 Week 1 Session 2
For Details, type:
This session meets on Thursday from 10 to 11 am. Space is limited to 4 students per session. If this session is full, please choose the other session. The location is a Jitsi video conference link for Course-1-Week-1: For example: https://meet.jit.si/Course-1-Week-1
If you have any questions or if you schedule only permits you to attend a particular small group session, contact the course instructor. My email is davidspring at protonmail dot com.
Click Save. Week 1 now has 2 small group sessions each with 6 places available. Here is a Student view:

Scroll up to the Breadcrumbs menu and click Part 1. Assuming Mass Actions appears in the right block panel, check the box above Week 1 Small Group Signup and click Duplicate to Section Week 2 Topics. Then click on the arrow to start the action. Then scroll down to Week 2 Topics and click on the three dots to the right of the Signup Sheet to edit the title. Change the title to Week 2 Small Group Signup. Then click Save and return to course.
Then click on the Week 2 Small Group Signup to edit the first session. Click Actions, Edit. Change the title to Course 1 Week 2 Session 1. Also change the description to Week 2 and the link to week 2. Then click Save. Repeat for the other two options. Then check the box above Week 2 Small Group Signup and click Duplicate to Section Week 3 Topics. Then click on the arrow to start the action.
Edit Week 3 Small Group Signup and repeat the process to create small group signups for the remaining weeks.
How Students Sign Up for Small Group Sessions
Students can only sign up to one of the three time slots each week. They simply click on the Signup button They can remove themselves from one session by clicking Remove my signup. Then they can sign up to another. A maximum number of students can be set for each time slot – which in the case of our courses is 4 students per small group session. In addition to students being able to remove themselves from a session, you as the course instructor can remove any student from any session.
How to export a sign-up list from the Signup Sheet tool
Once students have signed up to this time slot you can print off the register (as alphabetical list or by order of signing up) or email the group. In a Signup Sheet activity with several slots created, first turn on Edit Mode. Then navigate to the relevant course and select the Signup Sheet activity. This displays a page with the three signup options. At the top of the page is a menu. Click Sessions to see the names of students signed up for each session. Click Export to bring up this screen:

Click on the drop down arrow to reveal several options. Choose the option called Open Document ODS. Then click Download. The file will go to your Downloads folder and include the Session title, the student name, their email address and the course name.
How to Delete this Topic 0 and the fake forum from beginning of your course Home page
Every new Moodle Course Home page by default begins with this annoying “Topic Zero” section above the first topic. This Topic Zero section is bad because it does not have a section title. There is no way to add a section title, such as Welcome to our course, to the top of the Topic Zero section.
To make matters worse, the Topic Zero section automatically comes with an Announcements Forum which is intended to post class news and announcements. Sadly, this forum is not really a forum as students can not post questions or replies to this fake forum. So the name is pretty deceptive and confusing for both students and teachers. In addition, this fake forum automatically sends emails to all students when new announcements are posted. It is better to begin the course Home page with a Welcome article and then set up a more interactive way of communicating with students.
To delete the Announcements Forum from an existing course or course template, go to the course Home page and click Settings. Then scroll down to Appearance and change the number of forum topics from 5 to 0. Then click Save changes. Then turn on Edit Mode and click the three dots to the right of the Forum. Then click Delete.
To delete the fake forum at the top of any new courses you create, go to Site Administration, Courses, Course Default settings and scroll down to Appearance. Change the number of announcements from 5 to 0. Then click Save changes.
Use Custom CSS to completely hide Topic Zero
Sadly, deleting the fake forum from the top of the course home page still leaves the Add activity box and an ugly untitled blank space at the top of each course Home page. We can use custom CSS to hide the Topic Zero section completely on all of our courses. Each Moodle theme has an Advanced Settings tab with a Raw CSS box. Just copy paste the following into the Raw SCSS box: #coursecontentcollapse0 {display: none;}. Then Save changes.
We are using the AlmondB theme for our Moodle site home page and for the course home pages for all of our courses. To hide the blank space, go to Themes, AlmondB (or whatever theme you are using). Then click Advanced Settings. Then copy paste the following into the Raw SCSS box: #coursecontentcollapse0 {display: none;}. Then click Save changes. All of your courses should now begin with the Topic 1 section – which comes with a title you can customize.
Turn Topic 1 into a Welcome Article
Once you have hidden Topic Zero, your course home page should begin with Topic 1 (or Week 1). Turn on Edit Mode and change the title from Topic 1 to Welcome to (the name of your course). For example, our course template begins with the title Welcome to our Course Template Home Page!
Write your Course Welcome article as a Libre Writer document. Then click on Add an activity or resource. Then click the activity called Text and Media area. Then copy the Writer document text. Then place your cursor in the Moodle editor workspace. Then press Control plus V on your key board to paste the Welcome article text into the workspace. Then select the text and use the editor to increase the font size to 14. Below is our Course Template Welcome article text:
The course home page is the main page of any Moodle course. It's where the weekly and daily topics and activities are displayed. This template uses a special course format called Flexible Sections which allows you to add as many sections and sub sections as you want. Our Course Template divides the course into three parts. Each part is covers four weeks which includes three weeks of new activities followed by one week of review. Thus, it is intended for a 12 week five credit college level course. To learn more about how this template was created, visit our course website: https://createyourownonlinecourse.org/
How to add a course image above the course menu
Create a header image that is about four times wider than it is tall. For example, 2000 pixels by 500 pixels. Place the course title on the right half of the image. Optimize the image file size so that it is under 100KB. Then on the course Home page, click Settings. In the 'Course image' area, select the file icon. Click Upload a file. Then click Browse. Select your header image. Save as header. Then click Upload this file. Then click Save and display.
The purpose of these appointments is to help students with complex tasks such as converting their computer to Linux or setting their BIOS to boot from a USB Computer on a Stick or setting up a Virtual Private Server. If you would like to schedule a one to one appointment during one of these times, send me an email indicating the course(s) you are registered for, the day, date and time options that work for you and the topic(s) you would like to discuss. My email address is davidspring at proton mail dot com. I will email you back with a confirmation email.
Small Group Sessions are intended to help students complete their project assignments and prepare for quizzes. Lab sessions are limited to 4 students. Students can choose and sign up for one of the two lab sessions by going to the Course Home Page and clicking on the Weekly Topic.
Weekly Activities Checklist
Each week begins with a checklist of activities placed in the order that the activities should be completed and including the dates and times when homework assignments need to be submitted. Please refer to this checklist to help you complete your course activities each week.
What’s Next?
Read our full course welcome article and this link:
https://createyourownonlinecourse.org/
Then click on Part 1 to get started!
Turn Topic 2 into Part 1 First Steps
Change the title to Part 1 First Steps. Then click Add activity or Resource. Then choose Text and Media area. Then use Control plus V to paste the following:
Part 1 includes three weeks of new content followed by one week of review. Each week begins with a Signup sheet where you can sign up for one of two small group help sessions on Saturday. Each week is then divided into four sections. Each section includes a reading assignment, a video assignment, a video conference section, a project assignment and a quiz – both of which are due at the end of the week on Saturday by 11 pm.
Set Up Reservation system for Final Project Presentations
Week 12 is a special week in that there is no small group session at the end of Week 12. There are still 4 projects and 4 quiz due on Saturday night by 11 pm. However, instead of the small group session, each student will give a presentation of their final project on the final Jitsi class session (which is either Wednesday or Thursday evening). Each presentation is 10 minutes long with 5 minutes to present the project and 5 minutes to answer questions about the project. Since the final class session is 2 hours long, this means we need to set up a reservation system with 12 ten minute slots and each slot limited to 1 student.
To set this up, go to Week 12 Topics and click Add Activity. Then click Signup sheet. If you get an error message indicating you have exceeded the maximum number of sections allowed, go to the Site administration, Default course settings, Course format and increase the maximum number of sections from 52 to 60. Then click Save changes. Then add the Signup sheet activity to Week 12. For Title, type Final Project Presentations.
For Signup sheet notes, copy paste:
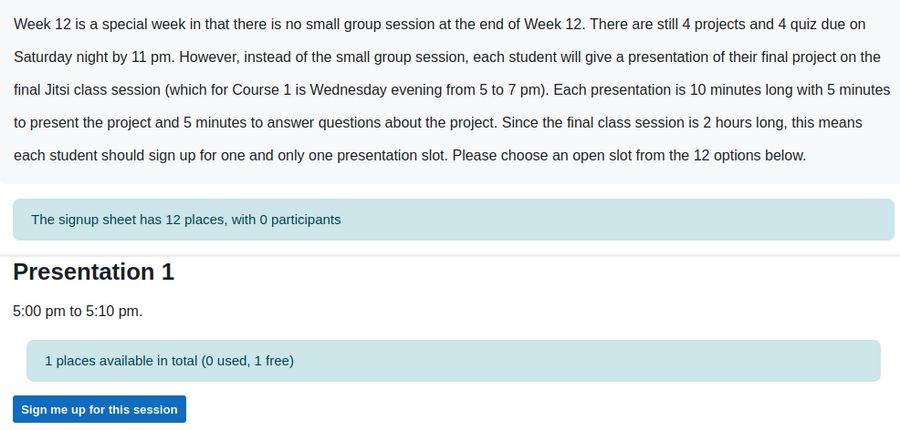
Week 12 is a special week in that there is no small group session at the end of Week 12. There are still 4 projects and 4 quiz due on Saturday night by 11 pm. However, instead of the small group session, each student will give a presentation of their final project on the final Jitsi class session (which for Course 1 is Wednesday evening from 5 to 7 pm). Each presentation is 10 minutes long with 5 minutes to present the project and 5 minutes to answer questions about the project. Since the final class session is 2 hours long, this means each student should sign up for one and only one presentation slot. Please choose an open slot from the 12 options below.
Click Privacy: Users can only see their signup.
Then click Save and return to course. Then click the Final Project Presentations link. Then click Add New Session. For title, type Presentation 1. For details, type 5:00 pm to 5:10 pm.
For number of places, reduce the number to 1. Then click Save. Then click Add New Session to add Presentation 2. Repeat to add all 12 sessions. Here is what the Presentation Options look like to a logged in student when done:
Other possible Signup Sheet activities you may want to create
You could use the Signup Sheet activity plugin to create a signup sheet to allow students to self register for online office hour appointments each week. The problem with doing this is that you would need to set up blocks of time for each course as signup sheets are connected to courses. In reality, your online office hours are shared between all of your courses and some courses require more help than other courses. In addition, some student needs are more urgent than other student needs.
Keeping direct control of your office hour appointments allows you to use your office hour appointments for the courses that need it the most – and rearrange your office hour appointments if need to help students with the most urgent needs first. If there is a week where several students have urgent needs that require 1 to 1 meetings, you can even provide additional online office hours to meet this need. So my advice is to set up your own calendar system and use this to control your office hour appointments.
Still there are many other activities which may require setting up an automated time slot system. These activities could include setting up Mid-course Project Presentations and or setting up Small group self help labs where students can sign up to help each other or get help from a small group mentor.
What’s Next?
In our next chapter, we will review Moodle tools and processes for confirming student progress through the course.