
In our previous article, we set up our Backup system. In this article, we will set up a Moodle Test site which we can then use to test updates before doing an update of our Live site.
Step #4 Set up DNS for a test1 subdomain
Log into your Canhost account and click on Domains to edit your Moodle domain. Then click Manage Name Servers. Then DNS to open your site DNS table. Click Add Record. For Type, click A. For Name, type test1. Then enter your server IP address and click Save:
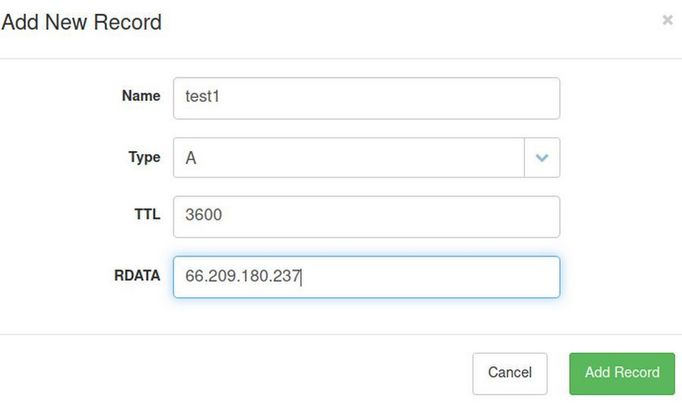
Then click Save Changes at the bottom of the table.
Step #5A Copy the Moodle data folder
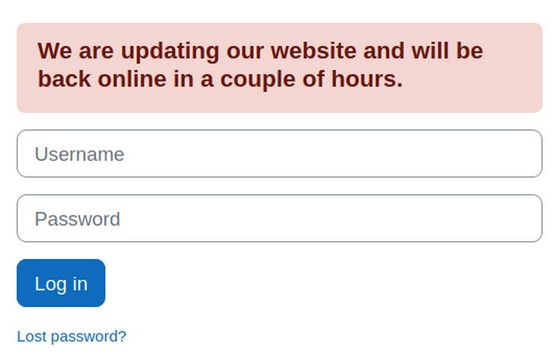
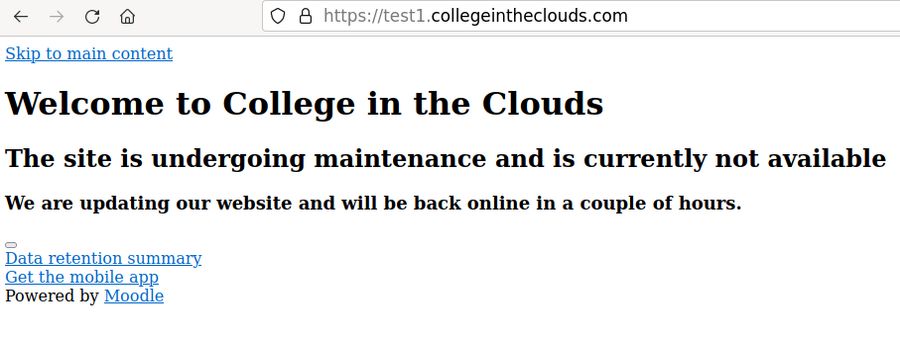
Before copying folders, it is essential to log into your Live site and place it in Maintenance Mode to insure that the files and database remain in sync. To put Moodle into Maintenance mode, go to Site Administration > Server > Maintenance Mode. When enabled, an “Under Maintenance” banner is displayed on the website. The message on this banner can be customized with this Editor:
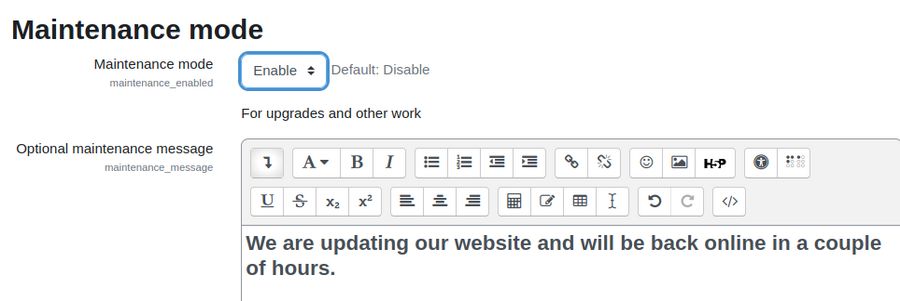
When in Maintenance Mode, there is no log in button on the Home Page. However, you can still login as the Admin by using the login URL:
https://test1.onlineschool.org/login/index.php
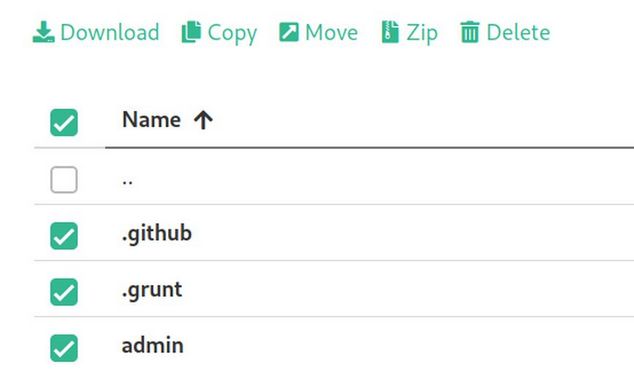
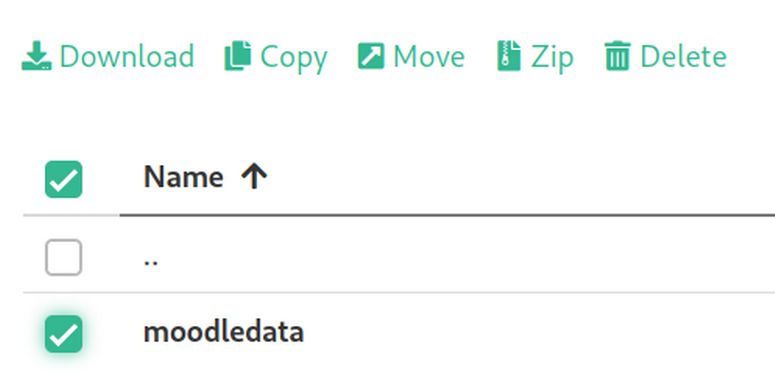
Then log into your Hestia website user panel and click Files. Then click Web. Then click your domain name. Then click the Private folder. Then select the Moodle data folder:
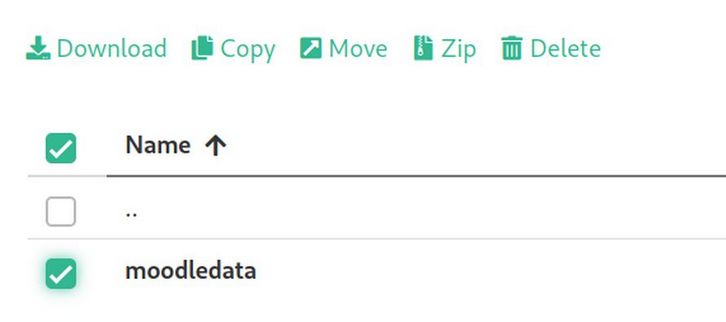
Then click Zip. Give the archive a unique name. Then click Create. Wait awhile for the zip to finish. Then select the zipped file and click Download. It downloads as archive about 20 to 30 MB. Then delete the zipped file in the private folder.
Step #5B Copy the Moodle public folder
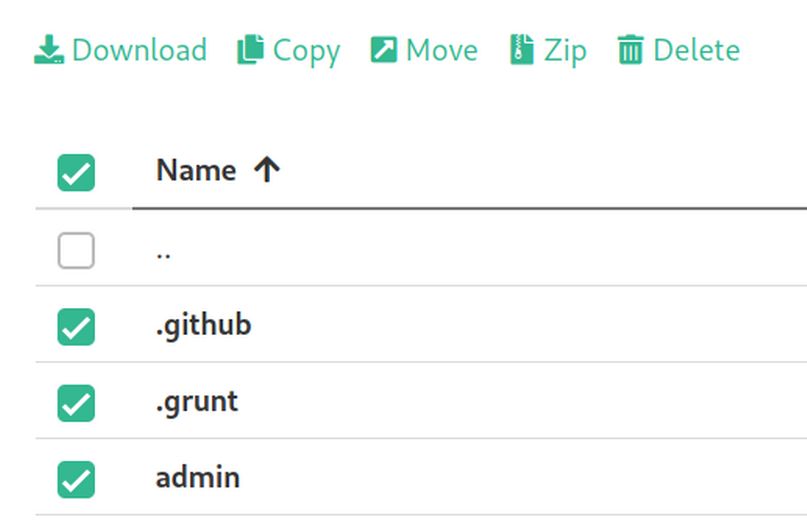
Click the public folder to open it. Select everything.
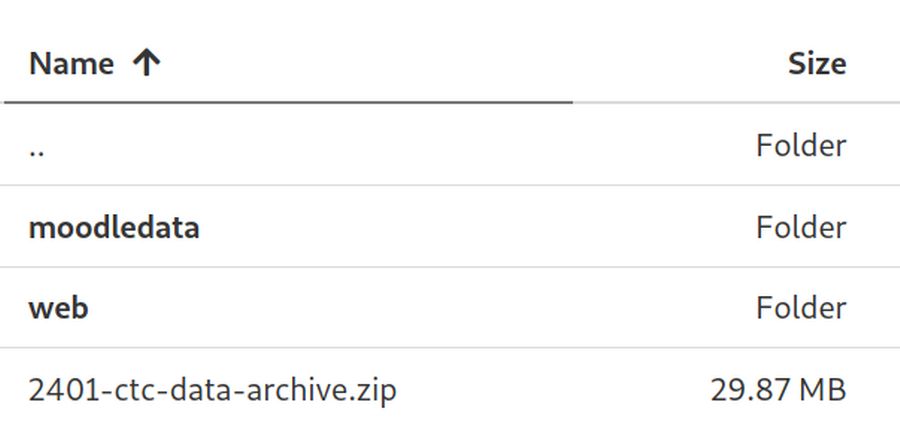
Then click Zip. Give it a unique name and click Create. It will take several minutes to create the zip. When done, scroll down to the zipped archive and click Download. This file will be about 80 MB. Then delete the archive file. Put both zipped files in a new folder called Moodle Backups.
Step #6 Export the existing database
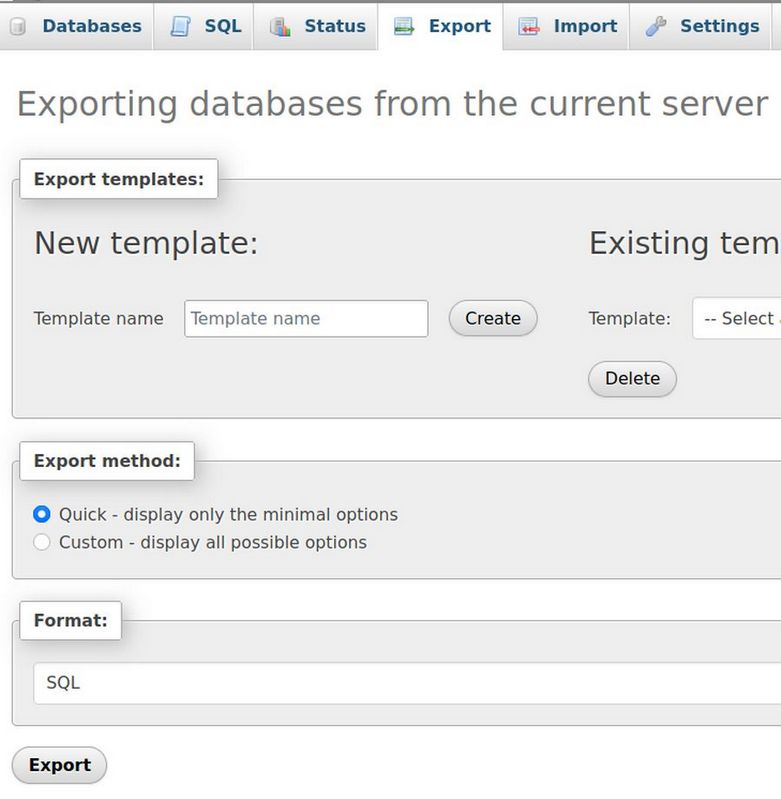
Click Exit to Control Panel to leave the Hestia File manager. Then click Databases. Note the user and password for your database. Then click phpMyAdmin and log into your database. Click on the database to load it into the Structure tab. Then click on the Export tab. Then click Export. ‘
The file will be about 50 MB. Then log out of phpMyAdmin. Then move the SQL file to your Moodle Backups folder.
Step #7 Create a new Database and Import the existing SQL file
Click DB, Add Database and create a new database. Note the user and password. Then click Save. Then click Back.
While it is easy to export a Moodle database using phpMyAdmin, there is a huge problem importing a Moodle database using phpMyAdmin. The Moodle SQL file is just too big for phpMyAdmin. Therefore, trying to use phpMyAdmin to import a Moodle SQL file is likely to lead to a Timeout and or errors as often, the database is not fully imported. The most reliable solution to this problem is to use your Linux Terminal to import a large Moodle Database. First connect your laptop to an Ethernet cable. Then log into your Hestia user panel and create the database. Note the database username, database name and database password.
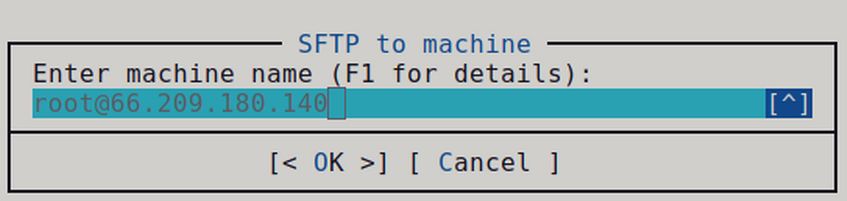
Install Midnight Commander on your Home Computer. Then open your Home terminal with Midnight Commander. Use the left panel to select the SQL file in your laptop file manager. Use the right panel to start an SFTP link using your SSH root at IP.
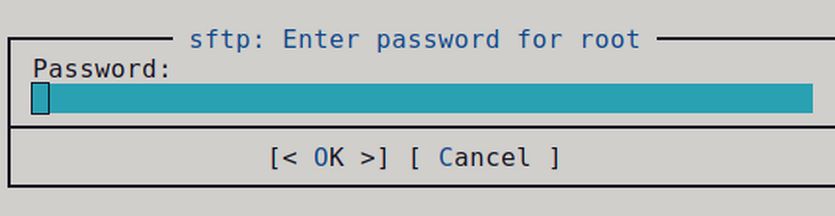
Then enter the ssh password.
Then use the right panel to open to the server /tmp folder. Then select the SQL file in the left panel and click Copy.
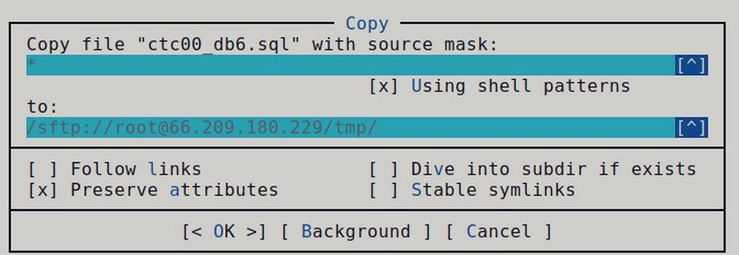
Click OK. Then type exit to exit your laptop Midnight Commander Next SSH into your server as root. Then, open Midnight Commander with mc. In the right panel, click on the three dots to go to the server root folder. Click on the /tmp folder and verify that the SQL file is there. Note the exact path and file name
/tmp/ctc00_db6.sql
Then exit Midnight Commander by typing exit, then pressing Enter.
While still in SSH as root, type mysql to enter mysq followed by your database name:
mysql -u <username> -p
-u - for Username
-p - to prompt the Password
Example:
mysql -u db1_user1 -p
mysql -u ctc00_un8 -p
Press Enter which will reply with Enter password: Enter your database password here and press Enter to return to the mysql> prompt. Then enter the database name
mysql> USE db1;
Example:
mysql> USE ctc00_db8;
Then press Enter to return to the mysql> prompt. It will reply with Database changed.
Then enter the path to your SQL file:
mysql> source /tmp/big_db_backup_file.sql;
mysql> source /tmp/ctc00_db6.sql;
Then press Enter and the SQL file should be loaded into the database. It should end at a MariaDB prompt. To leave MariaDB> type exit; and press Enter.
To end the SSH session, type exit and press Enter. You can then go back to your Hestia User account and view the file with phpMyAdmin to see if there are any errors that need to be fixed.
To insure that the SQL file has been fully imported, select the DB and click Export. Then compare the file size of new SQL file to the original SQL file to see if they are the same. In addition, you can copare the number of tables on page 2 of the original database to the new database. In my case, the file sizes were the same and both had 246 tables on Page 2. There were no errors. Then log out of phpMyAdmin
#8 Add the Subdomain to your Hestia User Account and add SSL
In your Hestia User account, click Web. Then click Add Web Domain. For Name, enter the sub domain. For example, test1.onlineschool.org. Then check the DNS Support box but not the mail support box. Then click Save. Then click Back. Then click Edit. Then click Enable SSL. Also Use Lets Encrypt. Then click Save and wait for success. Then click Back.
Step #9A Load the Moodle data folder to your Test site
In the Hestia File manager, go to your test1 private folder and add the data zipped file. Then extract the file which creates a web folder:

Click web, domain, private, unzip, click again web, domain private to see the Moodle data folder. Select it
Then click move to move the Moodle data folder to the first test site private folder.
Then delete the web folder and the zipped file.
Step #9B Load the Moodle public folder to your Test Site
The public folder is very large. So you should be connected to an Ethernet cable before loading it. Open the public folder and click Add Files. Wait for the zipped file to load. Then unzip the zipped file. Open the web folder. Domain folder and public folder. Select all of the files and folders:
Click move and move all of them to the first public folder. Then scroll down and delete the web folder and the zipped file. Also delete the index.html file and the duplicate robots.txt file.
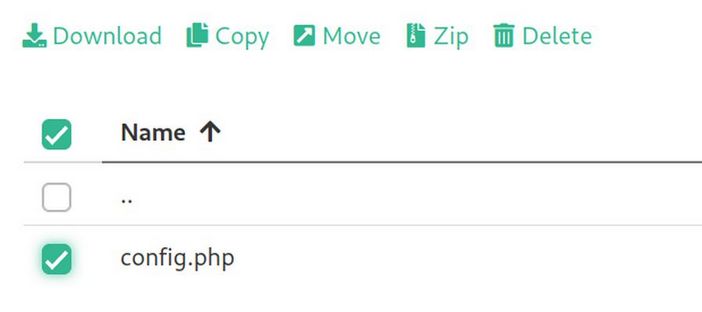
Step #10 Change your Test Site Configuration File Settings
Open config.php and change Line 10, 11 and 12 to the db name Db user and db password to the new db. Then at Line 21 and 22 add test1. Then click Save.
Visit your new test site: https://test1.onlineschool.org/
You might see the following error:
Moodle Error Exception – Class Mustache not found
You can try clearing the Moodle cache by going to this web page:
https://yoursite.com/admin/purgecaches.php
For example,
https://test1.collegeintheclouds.com/admin/purgecaches.php
However, this might not solve the problem. A more powerful solution is to use your terminal to purge caches. SSH as root into your VPS. Then go to your test site public folder by copy pasting this command:
cd /home/ctc00/web/test1.yoursite.com/public_html/
Then copy paste this command:
php admin/cli/purge_caches.php
Then go to your home page:
https://test1.onlineschool.org/
Fix Moodle Login Error
Visit your Moodle login page (ie. https://example.com/login/
You might see the following error:
Unable to find a default lock instance.
You can fix this by logging into your Hestia User account and clicking on the File manager. Then go to your test site moodledata folder inside of which is a muc folder. Open the muc folder to see a config.php file. Delete or rename this config.php file.
Create a Cron job for the test site
The Moodle cron job need to be set up for the test sites in addition to the live site. In the Hestia User Panel, click CRON. Select your Live Site Cron job and click Edit. Copy the command and paste it into a Writer document.
Add test1 to the path of the command in your Writer document. Then copy this new command to your clipboard.
Click Back. Then click Add Cron Job. Then paste the new command in the Command box. Click Generate to run the Cron every minute. Then click Save. Click Back. Then log out of Hestia.
Then go to your site Login page and log in using the same admin user and password as your Live site. Then click Site administration. Click Reports, System Status to verify the Cron is running properly.
Before we update Moodle on our test site, we should take it out of maintenance mode to check that everything appears and works correctly. Make sure that all of your pages in your Menus are working. Before checking, clear both the browser cache and the Moodle cache.
Click the Server tab. Then click Environment. The top of the screen will provide your current version. In our case, it was 4.1.1. Scroll down the page to see that all of the statuses are green. Then change the version to the version you want to upgrade to. We will update to 4.3, but the only option is 4.2 upwards. Select this. Then scroll down the page to see that all of the statuses are still green.
What’s Next?
In the next article, we will update our Test Site and then if all goes well, we will update our Live Site.