
Your Moodle Home page is important because it is the public face of your Moodle website. Your Moodle Home page should not only welcome visitors and guests to your website but also explain the purpose and benefits of your courses. It should also explain the structure of your course categories, courses and other educational resources. Yet, despite its importance, one of the most common complaints on the Moodle Forums is the difficulty of modifying the appearance of the Moodle Home page. In later articles, we will explain how to use a custom theme to make the Home page customization process easier. However, because we do not yet have a custom theme, in this article, we will provide a process for customizing your Moodle Home page.
Compare your Home Page to the Moodle Demo Home Pages
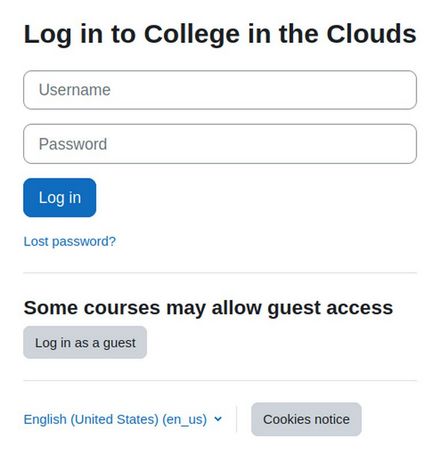
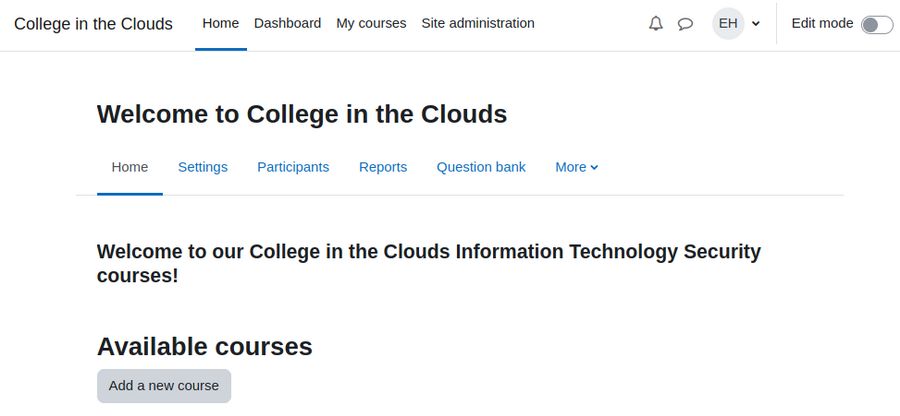
One of the first things you will want to do after creating your Moodle Site is to customize your Home page. To understand how this is done, we will compare our Default Site to the two Moodle Demo sites. Here is what the home page of our initial Moodle website looks like when not logged in:

Our initial Home page looks pretty empty. The top row is called the Navigation bar. To the non-logged in user, there is only one menu item called Home. To the left of the Home menu item is the site short name. To the right is a Languages drop down which only has one language. But you can add 120 languages to make your educational website available to people all over the world. In the right corner is a link to your website log in page.
Below the Navigation bar is the website header area with your website full name. The box below this, which is empty, is called the content area.
Click the Log In link to reach your log in page:
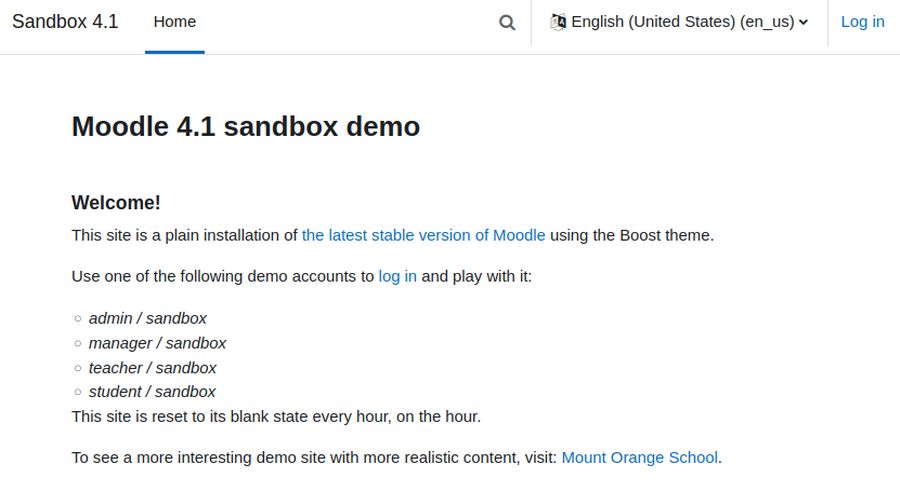
Then log in with the administrator username and password you created when you made your Moodle website. Alternately, if you have not yet made your own Moodle website yet, you can open a web browser and log into the Moodle Sandbox Demo website (the one without content). Here is a link to the Moodle Sandbox Demo site:
https://sandbox.moodledemo.net/
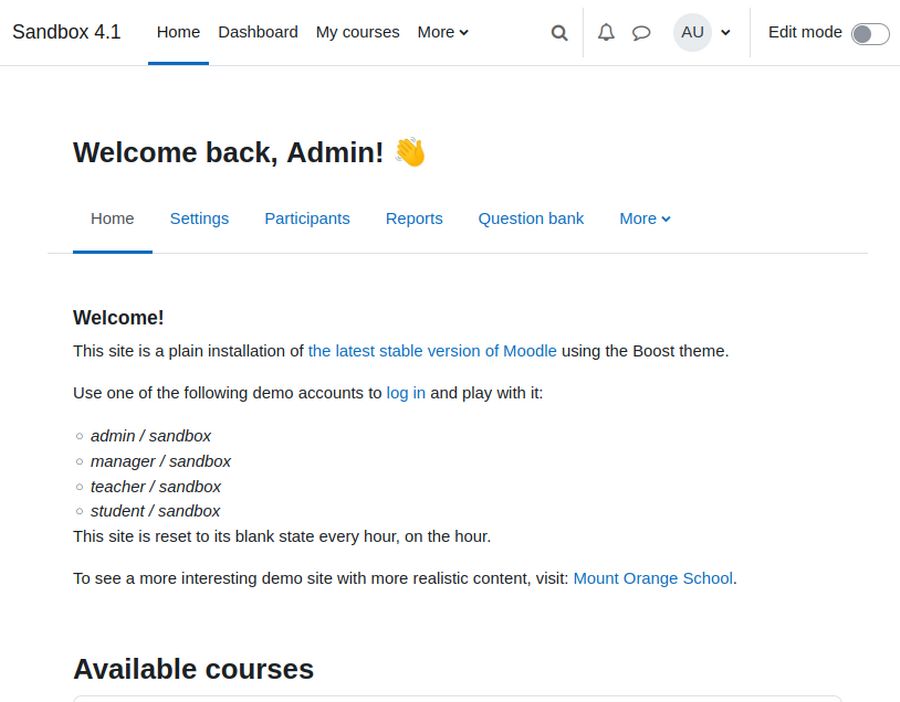
The Moodle Sandbox Home page is similar to our default Home page but has three additions. First, the Language drop down has added more than one hundred languages. Second, a Welcome article has been added to the Content area. Third, two courses have been added and made visible in the Content area below the Welcome article.
To view the back end of the Moodle Sandbox Demo Site, click on the log in link. Here is a direct link for that log in page. https://sandbox.moodledemo.net/login/index.php
Log in to the sandbox site back end as an administrator with the username admin and the password sandbox. The sandbox website may have been altered by others and thus may be slightly different than your initial Moodle website. It is also missing several important features. For example, it does not allow us to install Moodle plugins. So using your own website is better. Or wait until just past the start of the hour to use the Sandbox Moodle website. Here is what our Moodle website “logged in” page looks like when we first log in:
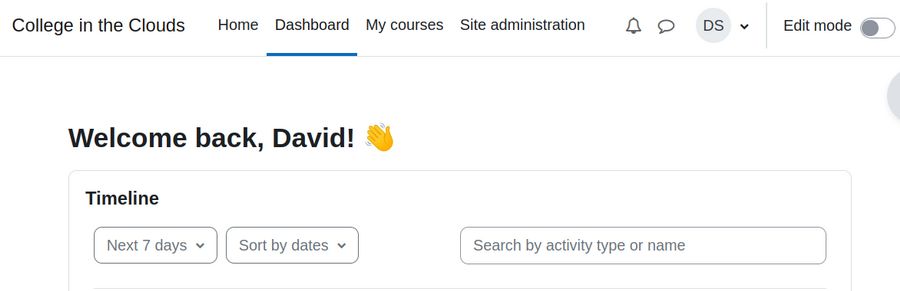
The default page after logging in is the Dashboard – which includes the calendar. Click the on the Home page to see that the Welcome back message has been replaced by the website full name.
Then click on the Dashboard again to see that the Welcome back message has been replaced by the word Dashboard. Note that the Sandbox Moodle website “logged in” page takes us the Home page:
Change your Website Opening “Logged In” Page from the Dashboard to your Home page
Because the Dashboard page changes as the role of the user changes, for the sake of consistency, we will change the opening page of our default Moodle website so that it also opens on our Moodle Home page.
Go to Site Administration, Appearance, Navigation and your will see that the Home Page for all Users is set for Dashboard. But on the Sandbox Moodle site, it is set for Home. So change the default Moodle site setting from Dashboard to Home. Then scroll to the bottom of the page and click Save Changes. Then click Home.
Add a Custom Title and Welcome Article to your Home page
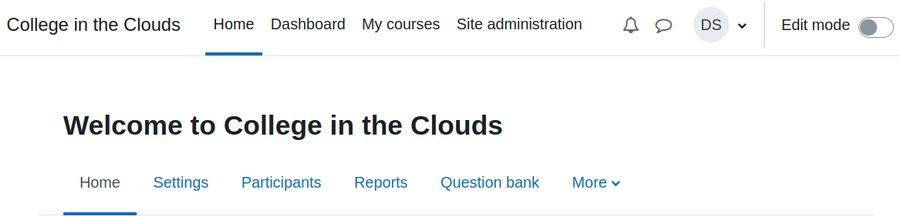
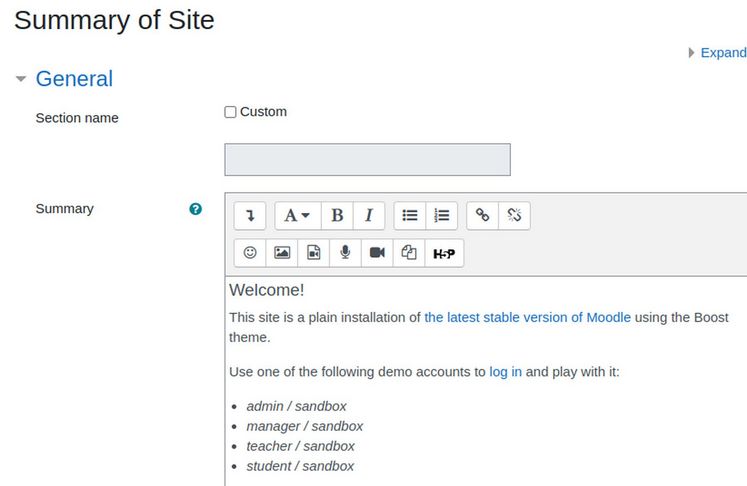
To put a Welcome article on our Default Moodle Site Home page, click Site Administration. Then scroll down to Site Home Settings. Alternately, from your Home page, click Settings. Either way, this screen appears:
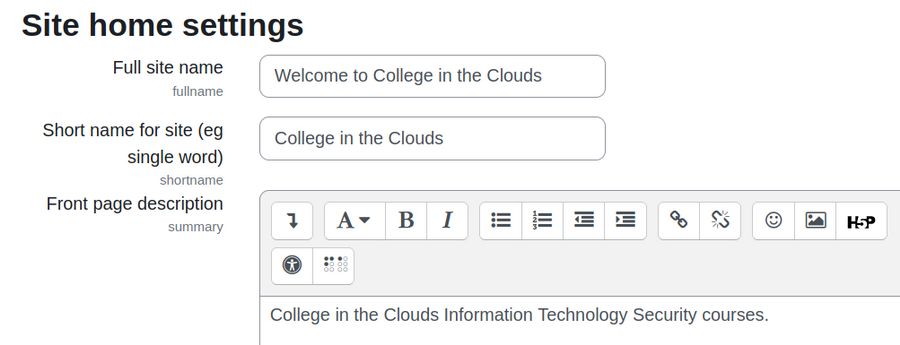
Add a Home Page description. Then click Save at the bottom of the page. Then go back to your Home page. The new Title is now showing but the new Site Description is not showing. To add the Summary of Site to the Home page, go to the Site Home page and turn on the Edit Mode in the upper right corner.
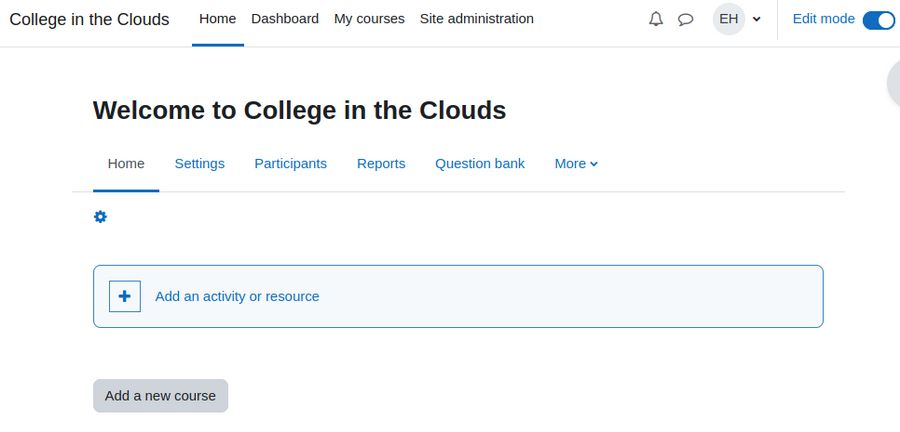
This will add two new items to your Home page. There is a new settings wheel. Below this is a link to Add an Activity or Resource. Click on the new Settings wheel. This brings up a screen called Summary of Site.
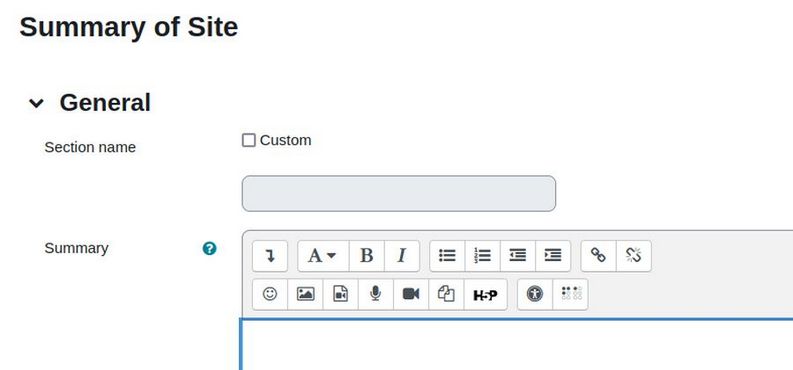
Click on the Down arrow to see more Editor functions.
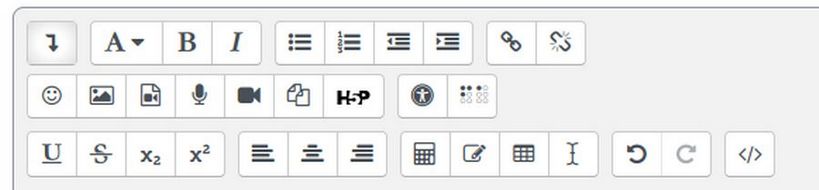
We will review some of these Editor functions later. For now, type in a sentence and use the A button to change the size of the text to Medium heading. Then click Save Changes. Then go back to the Home page and turn off the Edit mode.
Next, log into the Sandbox Demo site as an Administrator and click on the Settings wheel and click Turn on Edit Mode. Then click on the small settings wheel.
The Sandbox Demo site Home page content also uses the Summary of Site Editor to create its Home page content.
Turn off Available Courses on your “non-logged in” Home page
You may not want to display a list of your courses on your “non-logged in” Home page (especially since we do not have any courses built yet). To turn off the Available Courses module, click on the Settings menu item on the Home page. Then scroll down to the Site Home section and change the first box from List of Courses to None. Then in the next section, Site Home items when logged in, leave the list of courses to make them visible for logged in users.
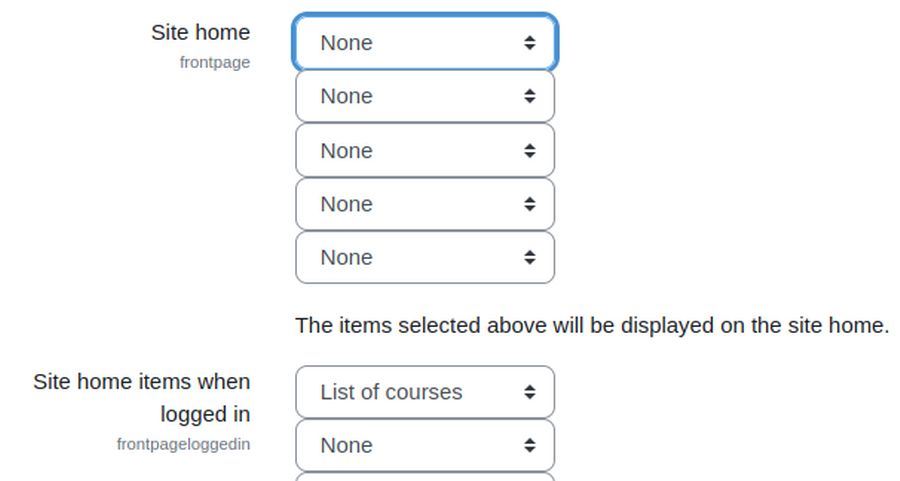
Then scroll to the bottom of the page and click Save Changes. Then open a web browser and visit your Home page as a non-logged in visitor to verify that the List of Courses box is now gone on our public Home page.
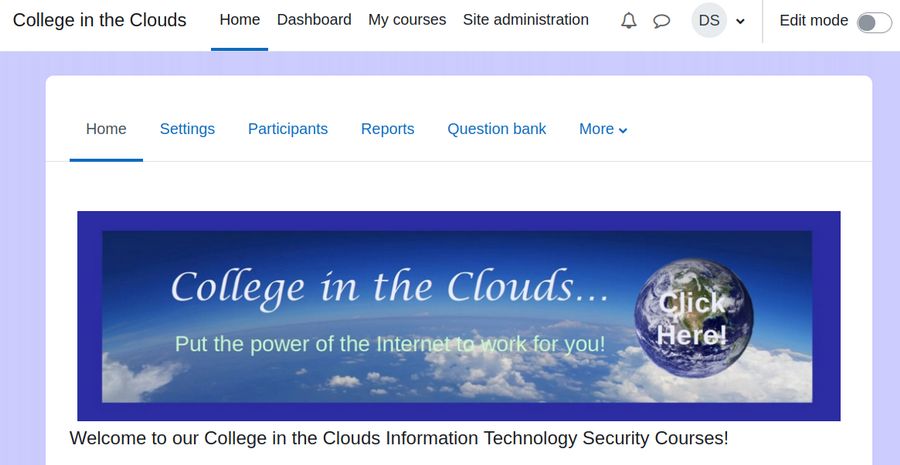
Replace the Moodle Header Title with our own custom Header Image
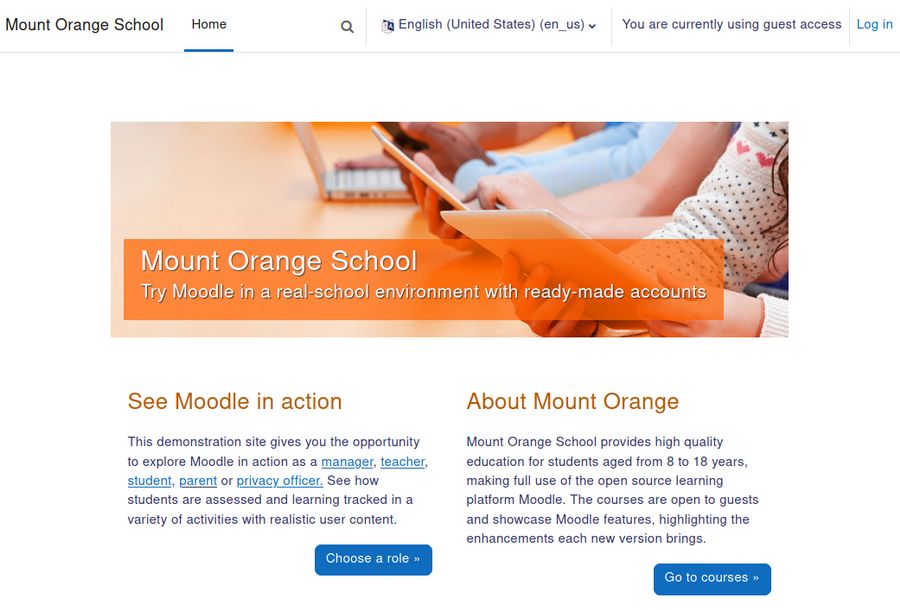
Go to the Home page of the Moodle Demo Site called Mount Orange School and you will see that it has a cool image instead of a Header title on the Home page. Here is a link to the Mount Orange Demo site Home page: https://school.moodledemo.net/
We will add a similar header image to our own site by first adding the new header image to our Summary of Site area and then hiding the default Header title. Go back to our default site and click on Home. Then click Turn on Editing. Then click on the Summary of Site Settings wheel. Then click on the Insert or Edit image button. This image properties screen will appear:
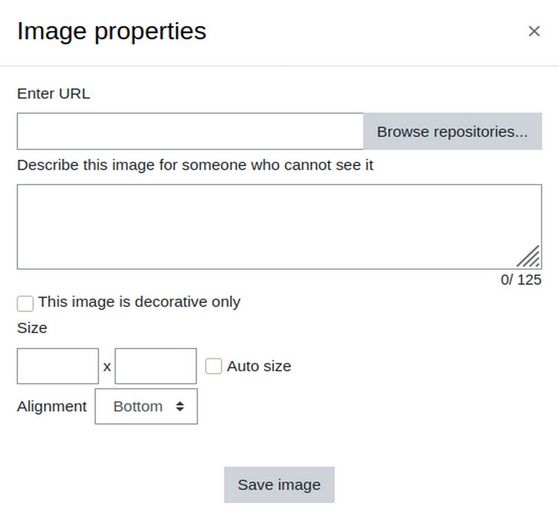
Click Browse repositories. This opens the File Picker. Click on Upload a File.
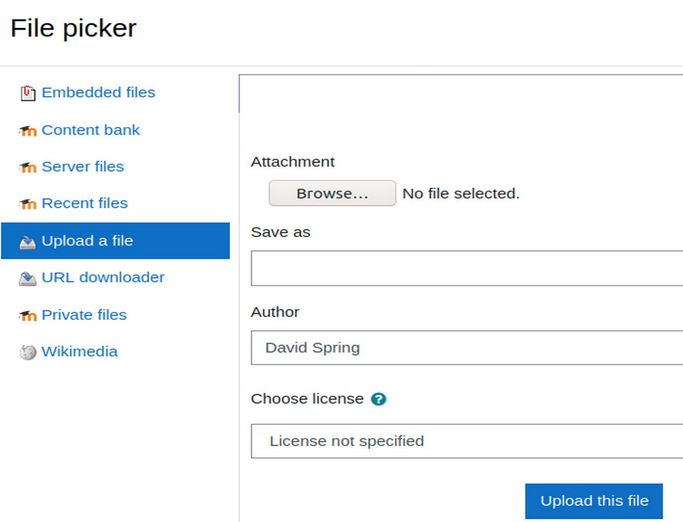
Click on Browse. This opens your home computer file manager. Navigate to your custom header image and open it. Then click Upload this file. Give it a descriptive name. Then click Save Image. This returns us to the Summary of Site Editor. Click Save Changes. Then turn off the Edit mode.
Change Home page background color
Go to Administration, Appearance, Themes, Boost, Background image. Then drag and drop a light blue image into the background image box. Then click Save and view the Home page again:

Use CSS to Hide the Header Title section and add a background color to our content section.
It is useful to know both HTML and CSS to adjust the appearance of a Moodle website. Here is a link to our College in the Clouds free course on learning HTML and CSS:
In particular, it is useful to know how to use the Firefox inspector to identify CSS classes for the HTML elements you want to change. Here is a link to an article I have written on how to use the Firefox inspector:
https://learnhtmlandcss.com/3-css-basics/3-4-how-to-become-a-css-detective
Using this tool, I determined that the CSS selectors for the Moodle Header Area and Content Area are called:
#page-header
#page-content
In addition, if you add the following CSS selector, any change you make will only apply to the Home page header and not to the Moodle header on other Moodle pages.
#page-site-index
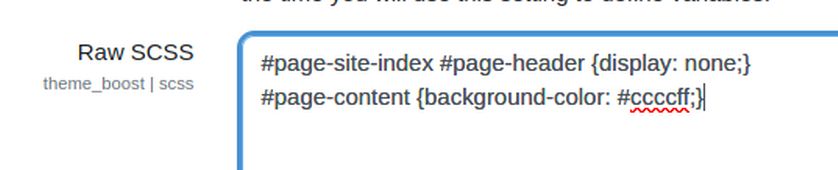
Here is the CSS we need to add to hide the header text and use CSS to add a background color to the content area:
#page-site-index #page-header {display: none;}
#page-content {background-color: #ccccff;}
Click on Administration, Appearance, Themes, Boost, Advanced Tab. Then copy paste the above into the section called Raw SCSS:
Click Save Changes. Then click Site Administration, Development tab, Purge Caches, Purge All Caches. Then open a separate browser, clear the browser cache and reload your Moodle Home page.
Add a Video to our Home page
We will eventually provide a better solution for modifying our Home page when we add a custom theme. For now, click on Edit Mode to turn it on. Then click on the settings wheel. This opens the Summary of Site editor. Press Enter on your keyboard to create a new line. Then click on the Insert or Edit a Video icon in the editor menu.

If you have created one or more videos for your courses, it is best to host them on a YouTube channel or other video sharing platform. Click on the Video tab. Then copy and paste the video link in the Source URL box. We will insert a link to our College in the Clouds video: https://www.youtube.com/watch?v=yboWT4OwqEk
Then click Insert Media. Then save changes and then view your website as a non-logged in visitor.

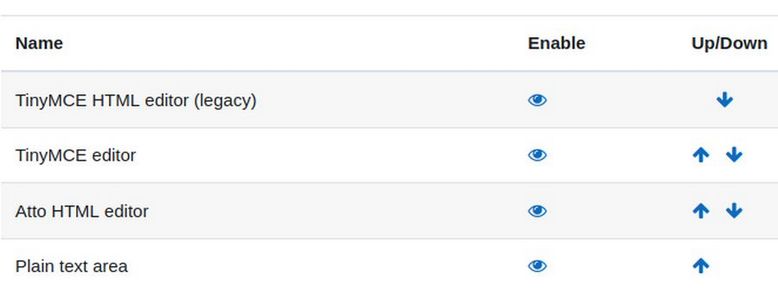
Replace the Moodle Default Atto Editor with the TinyMCE Legacy Editor
The default Moodle Editor, called Atto, is an ancient editor that will some day be replaced by the TinyMCE editor – which has much better functionality. To change editors, go to Site Administration, Plugins, Text Editors, Manage Editors. Then move the TinyMCE Legacy editor to the top of the list:
Change the font size on your Home page Text
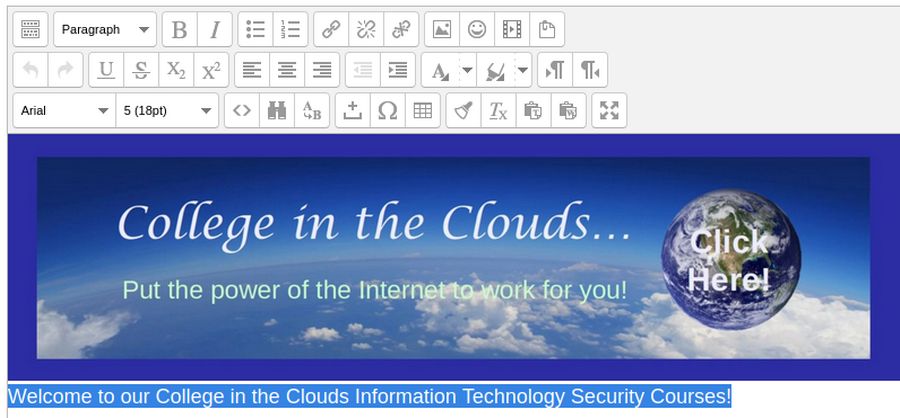
Go to the Home Page and click Edit Mode. Then click the settings wheel. It shows the Tiny MCE legacy editor but only has one row. Click on the Toolbar Toggle icon in the upper left corner to display all three rows. Select the text and change the formatting from H4 to Paragraph. Then change the font size to 18:
Then click Save changes. Note that the TinyMCE Legacy editor does not have a Youtube video insert button. Either switch back to the Otto editor or click on source code button to add this to the source code:
<div><a href="https://www.youtube.com/watch?v=yboWT4OwqEk">https://www.youtube.com/watch?v=yboWT4OwqEk</a></div>
Then click on your Home page to see the result. Congratulations! You now have a relatively easy way to control the appearance of your Home page welcome article.
What’s Next?
Now that we have control over our Home page Welcome article, we will next look at how to create user roles and permissions.