
In this article, we will update our Test Site and then if all goes well, we will update our Live Site.
Step #11 Update Moodle on your test site.
Also check that all of the plugins and themes are updated. We are finally to update Moodle on our Test site.
11A Create a new Backup of both the test site and live site
In addition to having a test site, before upgrading to new Moodle version, you should have a proper backup of both your test site and live site. Download the Backup file in your Hestia User Backup.
11B Download the latest moodle package
Download latest moodle package from:
https://download.moodle.org/releases/latest/
Download the plus version (for example, 4.3.2 + version) to get the latest updates. Download the zipped file. It will be about 84 MB.
11C Put your site in Maintenance mode
Before you begin upgrading your site, you should put your test site back into maintenance mode to stop any non-admin users from logging in. Then you should wait for any currently running cron processes to complete before proceeding. To put Moodle into Maintenance mode, go to Site Administration > Server > Maintenance Mode. When enabled, an “Under Maintenance” banner is displayed on the website. The message on this banner can be customized with this Editor:
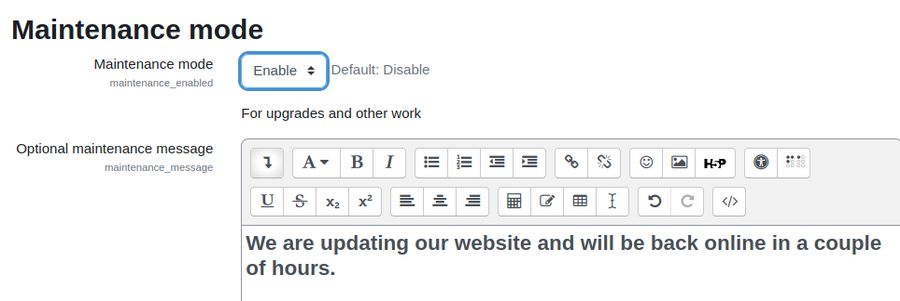
When in Maintenance Mode, there is no log in button on the Home Page. However, you can still login as the Admin by using the login URL: https://test1.onlineschool.org/login/index.php
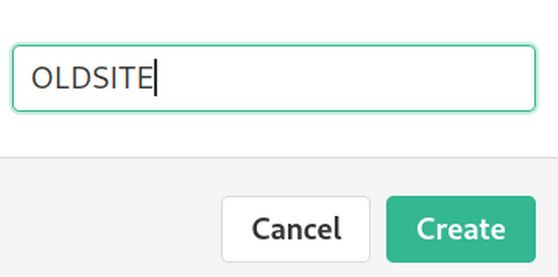
11D Create a new folder in your Moodle Test site public folder called OLDSITE.
Note: These instructions assume you have installed Moodle in your Test Site and Live Site public folder. If you installed in a sub folder, for example onlineschool.org/moodle, then the sub folder takes the place of the public folder.
Log into your Hestia User account and click Files. Click the web folder. Then click on your Test Site domain. Then click on the Public folder. Create a new folder called OLDSITE.
11E Move all of the original folders & files to the OLDSITE folder.
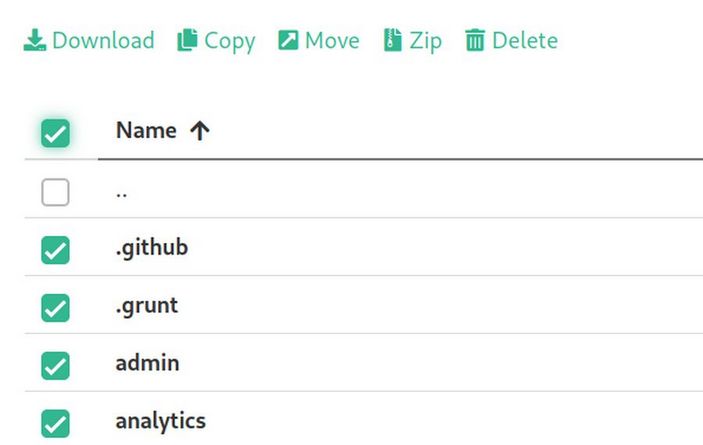
Click on the top box to select all folders and files in the public folder. Then uncheck the OLDSITE folder.
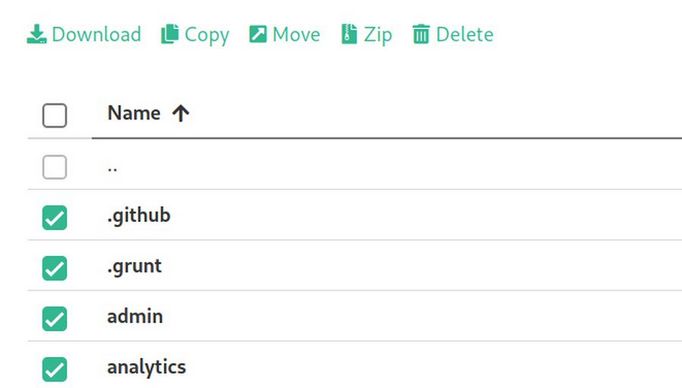
Then click Move to move all of the folders and files to your test site OLDSITE folder.
11F Add your New Moodle Latest Folders and Files to your public folder
Next (best to be connected to Ethernet cable), click ADD FILES and load the new zipped Moodle Latest package to the Public Folder.
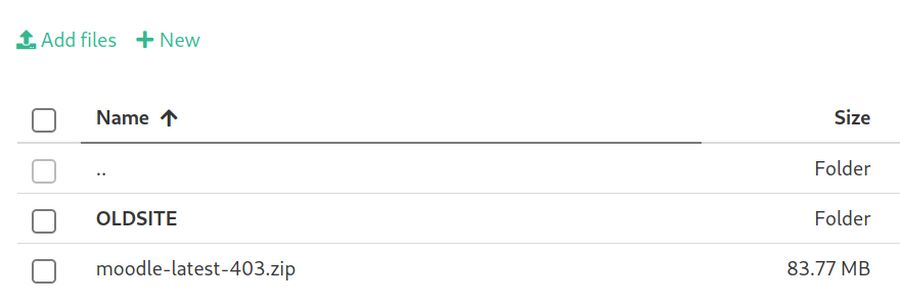
Then unzip the compressed file. This will result in a folder called moodle in addition to your OLDSITE folder and your moodle-latest zipped folder. Delete the zipped folder. Then click on the moodle folder to open it. Select everything:
Then click Move to move all of the folders and files to your test site Public folder. Then look for and delete the now empty moodle folder.
11G Copy your old Configuration File
Open your OLDSITE folder. Copy your old config.php file. which opens a screen allowing you to move the copy to your Public folder.
11H Move your old custom themes
Open your OLDSITE folder. Then click on the themes folder. You should find the two default themes, called Boost and Classic, as well as folders for our two custom themes called almondB and learnr. Select the two custom theme folders.
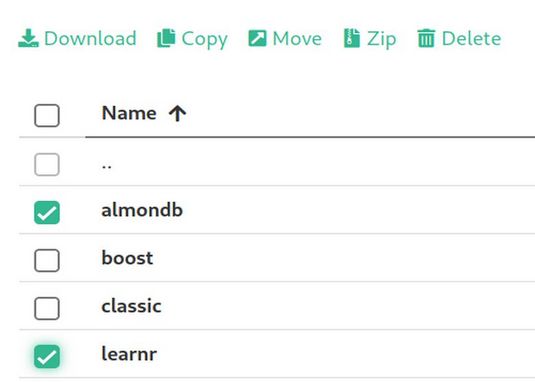
Then click Move to move these 2 folders to your public theme folder.
11J Move your old custom plugins in the local folder
Open your OLDSITE folder. Click on the local folder. You will find 5 folders called contact, course_creator, moodle-local-almondbpage-main, reminders and static pages. Select these 5 folders. Click Move to move these folders to your public local folder.
11K Move your old custom plugins in the mod folder
Open your OLDSITE folder. Click on the mod folder. You will find 3 custom folders called checklist, jitsi and tutorialbooking. Select the 3 folders. Then click Move to move them to your public mod folder.
11L Move your old custom plugin in the blocks folder
Open your OLDSITE folder. Click on the blocks folder. You will find folders called checklist and massaction. Select the 2 folders. Then click Move to move these folders to your public folder blocks folder.
11M Move your old custom plugin in the course format folder
Open your OLDSITE folder. Click on the course folder. Then the format folder. You will find a custom folder called flexsections. Select this folder. Click Move to move this folder to your public course format folder.
11N Move your old custom plugin in the filter folder
Open your OLDSITE folder. Then click on the filters folder. You will find a custom folder called filtercodes. Select this folder. Then click Move to move this folder to your public filter folder.
11O Move your old custom plugin in the report folder
Open your OLDSITE folder. Then click on the reports folder. You will find a custom folder called editdates. Select this folder. Then click Move to move this folder to your public reports folder.
11P Move your old custom plugin in the payment gateway folder
Open your OLDSITE folder. Then click on the payment folder. Then click on the gateway folder. You will find a custom folder called stripe. Select this folder. Then click Move to move this folder to your public folder payment gateway folder. Then log out of Hestia.
11Q Log in to Complete your Moodle upgrade
Log in to Moodle using the login URL: https://test1.onlineschool.org/login/index.php
Then go to Site administration. Moodle will automatically detect the new version and give you the option to complete your Moodle upgrade. You will see this screen:
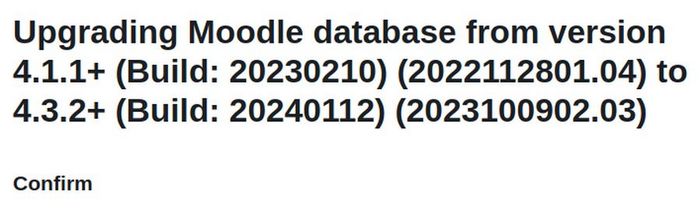
Click Continue. At the Server Check page, scroll down and click Continue. At the Plugins check screen, scroll down. An Activity module called Assignment will be deleted. Also an editor called tiny will be deleted. Also a log store called legacy will be deleted. Also two cache stores will be deleted.
Click Upgrade Database Now.
After awhile, several green success notices will appear. Instead, the Moodle update resulted in an Internal Server error 500 page. This was due to the page timing out before the update was completed. Just reload the page and let it load for awhile longer. After awhile, several green success notices will appear. Scroll to the end of the page and click Continue. This will bring up a New Settings screen:

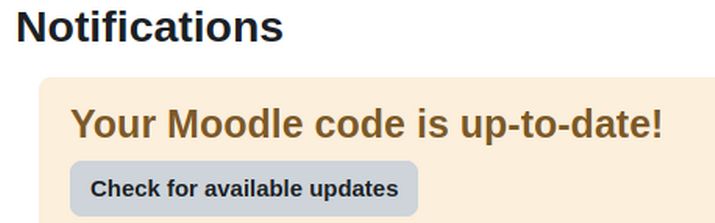
We will leave everything at default for now. Scroll to the end and click Save Changes. Then for Registration, click Skip. This ends in the Notifications screen. Click Check for available updates. It will likely say that a newer version of your plugins are available. Click Plugins, Plugins Overview to update any plugins needing an update.
Finally, Notifications will let us know that everything is up to date:
Then click Server, Maintenance Mode to disable Maintenance Mode. Then click on the Home page and log out.
Then check your website appearance and functions. Check all pages and functions to insure that your test site still works.
After updating the AlmondB theme, we need to update our custom CSS if the AlmondB header2 mustache file with Hestia. You can either change the three lines or just rename the existing file as old-header2.mustache and upload the header2.mustache we already changed in our File manager.
Also the images on the Front Page no longer show. This is because we previously used the Hestia File manager to create an images folder which is still in our OLDSITE public folder. Log into Hestia and use the File manager to move the images folder from our OLDSITE public folder to our updated site public folder.
Once everything is fine after working on the Live Site for a few weeks, you can delete OLDSITE folder for the test site and live site.
Once you confirm that the additional booking plugin work well with Moodle 4.3, you can report that it works here in the discussion at the end of the page.
https://moodle.org/plugins/mod_tutorialbooking
Once you confirm that the additional course creator plugin work well with Moodle 4.3, you can report that it works here in the discussion at the end of the page.
https://moodle.org/plugins/local_course_creator
Step #12 Repeat these steps for your Live Site
Repeat Steps 10 and 11 for the Live Site using the same Moodle update package you used on your test site.
11C Put your Live site in Maintenance mode
11D Create a new folder in your Moodle Live site public folder called OLDSITE.
11E Move all of the original folders and files to the OLDSITE folder.
11F Add your New Moodle Latest Folders and Files to your public folder
11G Copy your old Configuration File
11H Move your old custom themes
11J Move your old custom plugins in the local folder
11K Move your old custom plugins in the mod folder
11L Move your old custom plugin in the blocks folder
11M Move your old custom plugin in the course format folder
11N Move your old custom plugin in the filter folder
11O Move your old custom plugin in the report folder
11P Move your old custom plugin in the payment gateway folder
11Q Log in to complete your Moodle upgrade
Check your Live Site. Check all pages and functions to insure that your test site still works. If everything is fine after working on the Live Site for a few weeks, you can delete OLDSITE folder.
What’s Next?
In our final article, we will create a student guide.