
Many schools, colleges and Universities that offer Moodle online courses provide special Moodle Guides for Administrators, Teachers and Students. Sadly, these guides are often written by someone at the “Tech Department” who may know a lot about Moodle but tend to know little about teaching or learning. I have created a 400 page course and website to help administrators and teachers learn how to use Moodle. But it is unrealistic to expect students to read a 400 page book just because they want to take a Moodle course. We will therefore use this last article providing steps for creating a brief but understandable Custom Moodle Student Guide – a guide which includes not only text but also images. In this example, we will use screen shots from our online Moodle school, College in the Clouds dot com. But you should take the time to replace our screen shots with screen shots from your online school.
Student Guide to Moodle
Welcome to our series of courses on how to use free, secure online tools! Each of our courses combine a Curriculum website called College in the Clouds dot org – which uses the Joomla Content Management System (CMS) with an instructional website called College in the Clouds dot com which uses the Moodle Learning Management System (LMS). We do this because it is much easier to post and organize dozens of course readings and hundreds of course images using Joomla. At the same time, it is much easy to post and organize learning activities such as completing assignments, taking quizzes an tracking progress using Moodle. Combining these two powerful tools results in courses that are easier to build and easier to complete for both teachers and students.
All of our courses use a similar format of weekly assignments which start with course readings followed by course videos followed by course video conferences followed by projects and quizzes. Thus this student manual should be useful regardless of the exact courses you are taking.
We have divided this student guide into the following 6 sections:
1 Two Program Home Pages
2 View our first course Home Page as a guest
3 How to enroll in a course & Logging In as a student
4 Edit your Profile & Change your password
5 Taking Quizzes, Submitting Assignments & Tracking Progress
6 Tips to succeed in your online course
1 Two Program Home Pages
Here is the Home Page of our Course Readings website:
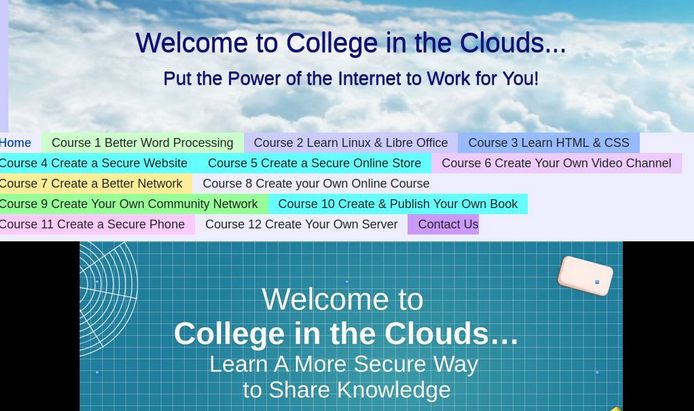
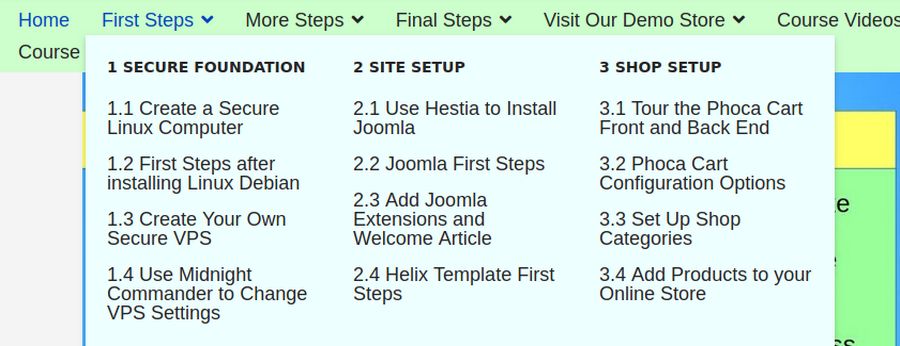
It has links to all 12 of our courses on learning free, secure online information sharing tools. Click on any course to see the 36 course readings displayed in a well organized Mega Menu:
Here is the Home Page of our Course Activities website, College in the Clouds dot com:
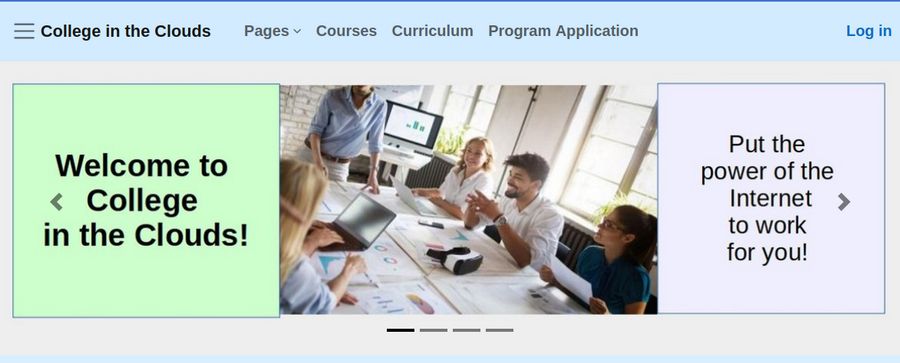
There is a Log In Link and four menu items in the top menu. Click on the Hamburger menu (three lines in the upper left corner) to see the same four menu items.
2 View our first course Home Page as a guest
Click Courses in either menu:
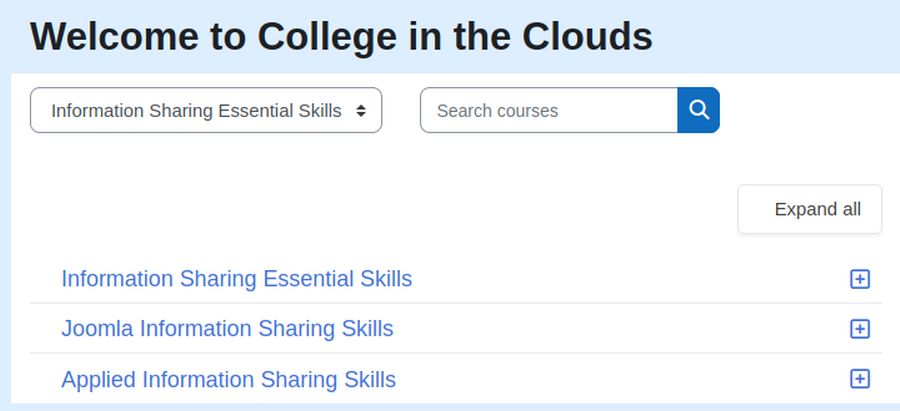
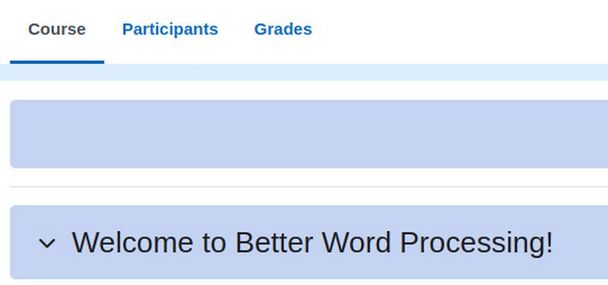
Click Information Sharing Essential Skills. Then click 1 Better Word Processing to go to the Course Home Page:
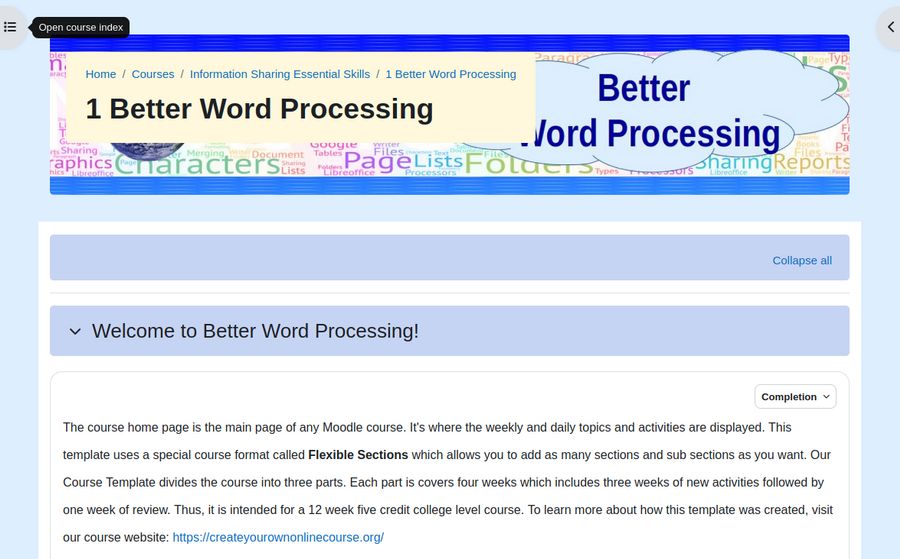
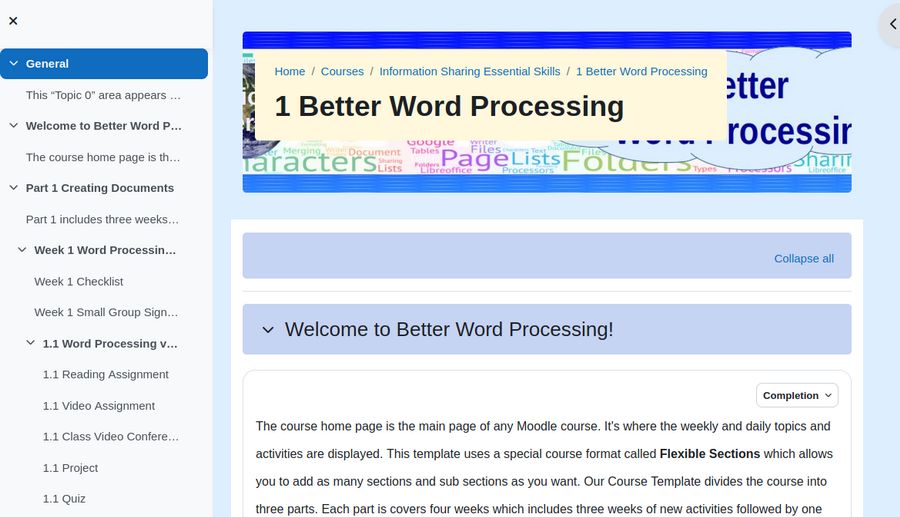
There are hidden menus on the left and right side of this page. Click on the Hamburger menu in the upper left corner:
In the upper right corner is a slide out Monthly Calendar of all Course Activities. Either scroll down the Course Home Page or click on Week 1 in the left side menu.
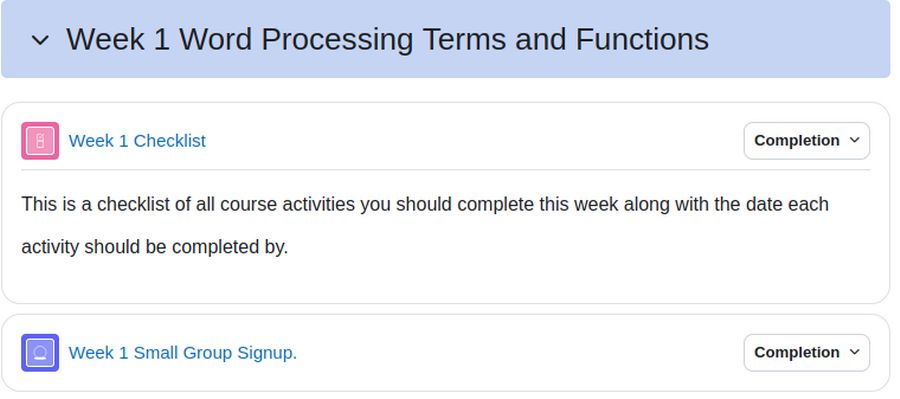
Week 1 has two activities: a Week 1 Checklist and an optional Small Group Signup for students wanting additional help. Scroll further down the page or Click 1.1 in the side menu.
There are four sections per week. Each section has five activities.
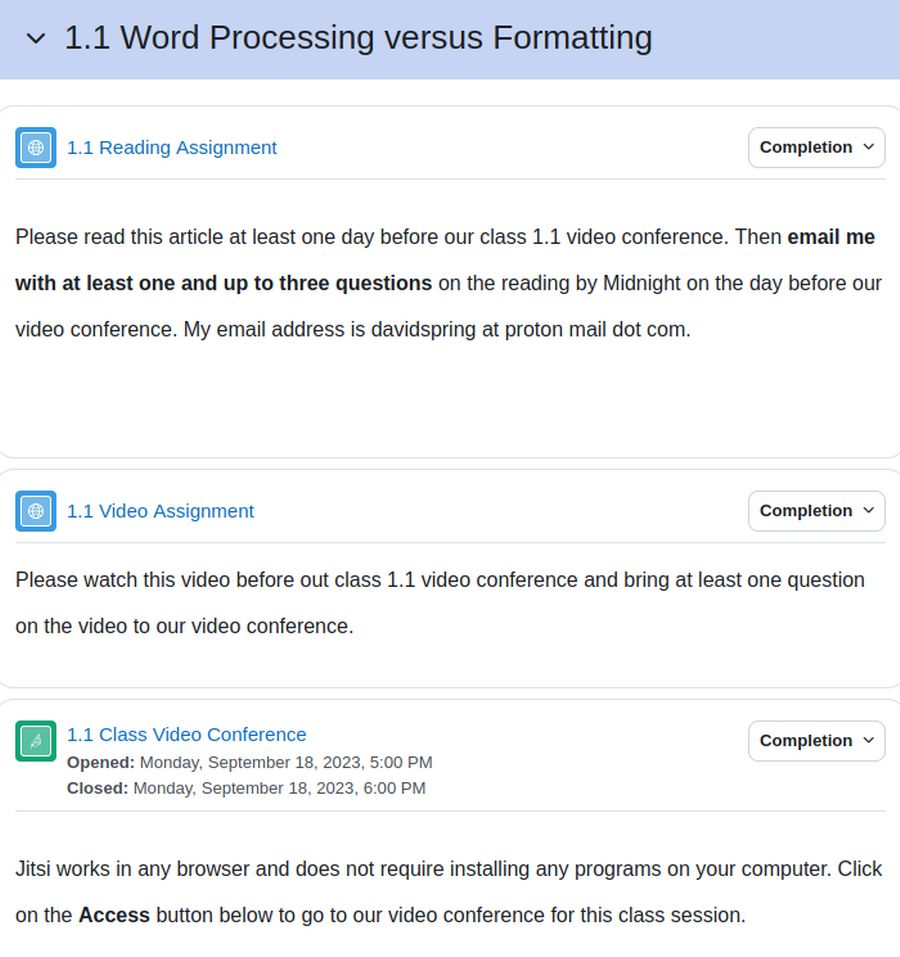
These are a Reading Assignment, a Video Assignment, a large group Video Conference Assignment, a Project Assignment and a Quiz. The pre-class Reading and Video Assignments will take about two hours to complete. The large group group video conference will take about one hour to complete. The Project and a Quiz will take about 30 minutes each to complete. So each section involves 1 hour with the Instructor and three hours of Independent study. As there are four sections per week, the total per week is 4 hours with the Instructor and 12 hours of Independent study.
Click on the 1.1 Reading Assignment. This takes you to Section 1.1 of our Course Reading Assignment website. Then click on 1.1 Video Assignment. This takes you to the videos for Section 1.1. It is important to take notes on both the reading and videos and to write down any questions you may have about either and then bring your questions to the Class Video Conference.
Click on 1.1 Class Video Conference. Then click on the Access button to go to the Video Conference link.
Click on the 1.1 project to complete it. Then click on the 1.1 Quiz to see that it is only visible to enrolled students.
3 How to enroll in a course & Logging In as a student
There are three steps to enrolling in one of our courses. The first step is to apply for our Program Application form in the top menu. It asks three questions: Your Tech Background, Your Reasons for wanting to take our courses (which courses you are interested in taking and why you are interested in taking them) and your Time available to devote to these courses.
We will review your application and send you and email you back with whether there is still space available in the courses you are interested in. If there is space available, we will provide you with a username and password for our Educational Program. Log into College in the Clouds dot com and go to My Courses to see that you are not yet enrolled in any courses. In the Home menu, while logged in as a student, click on Courses.
Then click on the course you want to enroll in. Click Select Payment type. Click Proceed. For the half price Early Bird Special, enter the coupon code (which we will give you in the acceptance email).
Then enter your Debit or Credit Card information and click Pay. Hopefully, you will see a Payment was successful message. This takes you back to the Course page where your course activities appear in the left side menu for you to start working on. You can also click My Courses in the left side menu to see the courses you are currently enrolled in. Then click on the course to go to the Course Home Page. Now the Course Home Page has three additional menu items in a Top Menu.
Participants has a list of all the participants in your course. Grades has a table of your grades on each course assignment. There is also now a checklist in the right side menu showing completion of Weeks 1 and 2 tasks just below the Monthly Calendar of Course Activities.
4 Edit your Profile & Change your password
When logged in, go to the site Home Page and click on your initials in a circle in the upper right corner to bring up the User Menu:
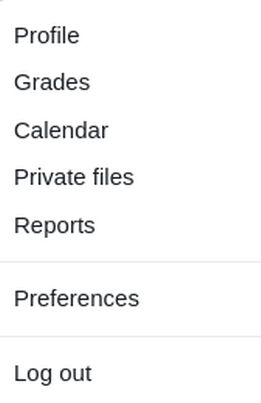
Click Profile to go to your Profile Page. Then click Edit Profile to add a Profile image and Profile Description. Your Profile image must be saved on your computer in .JPG or .PNG format. It will automatically be cropped and resized to 100 x 100 pixels
To change your password, click Preferences. Change Password. Note that your password must have at least 8 characters, at least 1 digit, at least 1 lower case letter, at least 1 upper case letter and at least 1 special character
5 Taking Quizzes, Submitting Assignments & Tracking Progress
With Moodle quizzes, there are a few things you should know beforehand other than the course material.
General Quiz Taking Tips
It is strongly recommended that you use a wired Internet connection when taking any quizzes or exams in Moodle. Wireless Internet (Wi-Fi) is not as reliable or as fast as a wired connection. For quizzes and for Moodle in general, do not use your internet browser's "Back" or "Forward" buttons to navigate from one page to another. Use Moodle's built-in navigation features instead.
Do not try to navigate away from the quiz window to visit other websites, check email, or use messaging, chat, or open any other browser windows.
Do not close the quiz browser window during a quiz. Doing this may result in your answers being submitted and/or receiving a score of zero on the quiz, depending upon how the quiz is set up.
Be sure that you submit the quiz when you finish taking it. If you close the quiz window without doing this, your score may not be recorded and/or your answers may be lost. Some Moodle quizzes are set with specific open and close times, giving you a window of time in which you must start and complete the exam. Don't wait until just before a quiz closes to start taking the quiz. A Moodle quiz or assignment must be completed and submitted before the closing time.
Starting the quiz
Online quizzes, tests, and exams are generally found under the course they are for. To take a quiz, click on the link for the test in the appropriate section of your Moodle site, review the directions, and click Preview quiz now or Attempt quiz now
During the quiz
Do NOT close the browser when you are taking the quiz or you will lose the answers you have already given. If the quiz has more than one page, you can switch pages by clicking Next page / Previous page. These buttons will also save your answers. However, be careful not to click the link that will take you to the next section of the course area!
You can also save your unfinished quiz by clicking Finish attempt. You can still edit your answers by clicking Return to attempt. You can also use “Quiz navigation” to switch pages in the quiz, if the teacher has allowed this. A quiz with a time limit will have a timer showing the “Time left”. You can also flag a question for yourself.
You can keep track of where you are in a quiz by looking at the Quiz Navigation window. A bold dark line highlights the number you are on. Clicking on any number in the navigation window will bring you to that question. Also, clicking on Finish Attempt will bring you to the final screen of the quiz.
If you want to flag a question to look at later, click on the flag icon next to the questions. The flag will turn red and the corner of the question's box in the navigation window will also turn red.
Submit your quiz for grading
After the last question, you will be taken to a Summary of attempt window. This will show you whether or not you have answered all of the questions in the test and any flags you may have set. You can go back to any of the questions simply by clicking on the question number. When you are ready to submit your quiz, but sure to click the Submit all and finish button on the last page.
After the quiz
Depending on the settings the teacher has chosen for the quiz, you will see quiz marks and the grade in the “Summary of your previous attempts”, the exam questions, answers, marks by questions, teacher's comments and the automatic feedback by clicking “Review”.
Student progress and completion tracking
We provide you with an opportunity to track and record your progress on the course area. Some of the activities and resources in the tracking are automatically connected to the progress tracking while others need to manually entered . Use the progress tracking to track the status of submitted assignments.
Using Checklists
All of our courses have a detailed checklist of things you need to do for class each week. When you open a checklist, you'll see a list of things to accomplish for this section of the course, instructions about due dates or assignments, and your progress.
Tips for taking our online courses at College in the Clouds
Our courses offer the most effective security training of any courses in the world. However, each of our courses requires a huge time commitment to prepare for each class and to complete all of the course assignments. Our courses do not require a lot of technical skill. No coding knowledge is required.
However, all of our courses require students who are self-motivated and interested in learning. You will need to devote at least 10 hours per week – 4 hours preparing for our video conferences, 4 hours attending our video conferences and 2 hours completing projects and quizzes.
One of our first tasks will be to help you convert one of your current laptops to Linux as neither Windows or Apple operating systems are secure fro online hackers.
Because all of our courses are project based courses, it is helpful if you have a real life project you can build during the course. Take notes. Summarize tasks in your own words. Set up a quiet area at home to “go to class.” Form study groups with other highly motivated students. Compare your work with that of your classmates
Write down questions about anything you are confused about. Bring your questions up before or during the video conferences. It is likely that anything you find unclear has also been unclear to other students. If one student is brave enough to ask questions, all of the students will benefit.
Successful online students tend to focus more on learning progress, than on competitive outcomes – i.e., mastery, rather than performance goals. They are able to relate to and tie their learning and course contributions to real life interests and experiences. And they attribute their success and learning to their level of effort, rather than to a fixed perception of intelligence or ability. They see that their level of effort has a direct impact on their success and learning.
What’s Next?
This completes our course on creating your own online course. Once you have successfully completed this course, you are eligible to repeat the course as an assistant mentor the next time the course is offered. If you would like to join our list of mentors or if you have any other questions or suggestions, feel free to email me.
Regards,
David Spring at Protonmail dot com