
In Moodle, every person from the Tech Team and administrators to teachers and students needs to be registered using the Moodle website interface. It is important to note that registering on the website needs to occur before one can be registered for a course. In this article, we will review how to set up a program registration process with Moodle.
Manual versus Automatic Registration
Moodle offers both manual and automatic registration processes. If you have a small school and are just getting started, you should use the manual process. As you grow to hundreds or thousands of students, you can make the switch to an automatic process. We will therefore begin by describing the manual registration process.
Create a Manual School or Program Application Form
Most students who are interested in attending a school or college understand that there is a limit to the number of students and some prior qualifications are needed to be accepted by the school or college. Students therefore understand the need to fill out an application form. Sadly, Moodle does not come with a Program Application form! We will therefore need to make our own.
We will create a Program application form which students can fill out online and then submit to us via whatever email address we want. We can then review their application and determine whether the student has the qualifications needed to take the course.
Alternately, we can email the student back to ask for additional information – or email them back explaining that the current course is full but that we can put them on a waiting list for a future version of the course. If the student is accepted, we can manually register them for our school and send them an acceptance email – which explains the next steps they need to take to apply for a particular course.
Below is an example of a customizable Program Application form which you can get from our website as a free download:
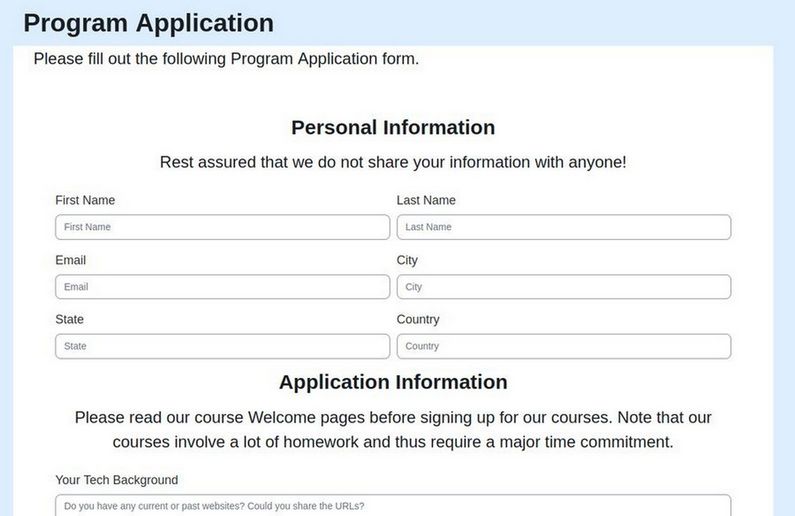
It is a simple HTML form called program_application.html. You can customize this form to whatever questions you want to ask those who are applying to your program. Below are the steps for displaying this form on your Moodle website.
Install the Static Pages plugin
In a previous article, we explained how to install and use the Moodle Static Pages plugin. If you have not already done this, you should do it now as it is needed to create and display our Program Application form. Here is a link to the Moodle Static Pages plugin Download page: https://moodle.org/plugins/local_staticpage/versions
In addition, you will need to download and install the Moodle Contact Form plugin. Contact Form is a Moodle plugin that allows your site to process and send information submitted through HTML web forms to the site's support email address or primary administrator if the support email address is not defined. Here is a link to the Contact Form plugin Download page: https://moodle.org/plugins/local_contact/versions
Then install it with the Moodle Plugin installer. At the end of the Install, you will be at the Contact Form New settings screen. Enter your website admin email. Then scroll to the bottom of the screen and click Accept changes. Skip the notifications screen.
Install the Moodle Filter Codes Plugin
To use a Captcha to reduce spam, we also need to install the Filter Codes plugin: https://moodle.org/plugins/filter_filtercodes/versions
Why you should learn how to create and use HTML forms
An HTML form is a relatively simple way for your viewers to answer questions – which are called Form Fields. These questions can be organized or grouped into sections called Field Sets. At the end of a form is a Submit button which sends the form information to your email address indicated in your form.
An HTML form consists two parts - the HTML ‘front end’ seen by the person filling out the form - and a hidden back end form processor. The HTML front end part handles the presentation while the hidden back end handles the form submission. We will supply you with a basic form which you can alter to fit your own needs. If you would like to ask additional more complex questions, then read one of the many HTML form tutorials. Here is a link to a pretty good tutorial: https://html5-tutorial.net/forms/introduction/
Here is summary on how our Program Application form is made. The actual form begins with an opening HTML <form> tag. Inside of the form tag is a form <fieldset> divider tag. Feel free to add more <fieldset> dividers if you have a longer form you want to split into two or more groups of questions. Our example form uses two field sets to divide Personal Information from Application Information.
The name of the fieldset group can be placed inside of the <legend> element, which is a child of the <fieldset> element. Note that you can use an h2 tag instead of a legend tag to style the fieldset title. In our example Program Application form, we used h2 tags instead of legend tags to simplify the styling or appearance of the field set titles. We also added a description below each h2 tag.
After the legend or h2 tag is another element or tag, the <label>. The label is used to add a caption to each form question you are asking. (The words element and tag mean the same thing).
Note that HTML uses opening and closing tags. Most opening tag must eventually be followed by a matching closing tag. Also note that classes are optional and are used to style the form.
A text field, which is the box used to answer the question, is generally 20 characters long. If you need a longer box, add the size attribute;
<input type="text" size="55" maxlength="140">
Here is an example of a simple form using a field set followed by a legend followed by three questions:
<form><fieldset>
<legend>Contact Info</legend>
<label for="name">Name:</label><input id="name"><br />
<label for="email">Email:</label><input id="email">
<label for="question">Your Question:</label>
<input id=”question” type="text" size="80" maxlength="140">
</fieldset>
<input type="submit" value="Submit now" /></form>
Forms typically us a method called post to send the form information to a particular email address. Here is an example:
<form id="application-form" class="application-form" action="../contact/index.php" method="post">
This tells Moodle to look for a folder called local and in the local folder look for a folder called contact (the Contact Us plugin) and in this contact folder look for a file called index.php – which will send the information submitted on the form to your Moodle email address using a method called post.
Multiline Text Boxes… If you want the question answer box to have more than one line, just change the input type from text (which is the default value) to textarea. Here is an example that has a width of 25 and a height of 5 rows:
<label for="question">Your Question:</label>
<input id=”question” type="textarea" cols="25" rows="7"></textarea>
To make a question required, add the following attribute:
required="required"
Example: <input type="email" id="email" name="email" placeholder="Email" required="required">
Almost any type of HTML field included with the form should automatically appear in the email. Examples: text, password, textarea, radio, checkbox or select drop-down.
Then Submit button can go inside or outside of the fieldset element. In our example, we placed the Submit button inside and at the end of the second field set element.
Program Application form HTML example
Now that you have some understanding of how HTML forms are made, open a text editor and copy paste the following three pages of HTML code:
<html><head>
<meta http-equiv="Content-Type" content="text/html; charset=utf-8">
<title>Program Application</title> </head>
<body>
<div class="staticpage-wrapper container">
<div class="staticpage-content">
<div class="application-wrapper">
<div class="application-intro mb-5">
<p>Please fill out the following Program Application form.</p> </div>
<div class="application-form-box rounded p-lg-5 mb-5">
<form id="application-form" class="application-form" action="../contact/index.php" method="post">
<fieldset>
<h2 class="text-center mb-3">Personal Information</h2>
<div class="text-center mb-4"><p>Rest assured that we do not share your information with anyone!</p></div>
<div class="form-row">
<div class="form-group col-12 col-xl-6">
<label for="name">First Name</label>
<input type="text" class="form-control" id="name" name="name" placeholder="First Name" minlength="2" maxlength="45" required="required" pattern="[A-zÀ-ž]([A-zÀ-ž\s]){2,}"></div>
<!--// name is a required field... do not change the value!-->
<div class="form-group col-12 col-xl-6">
<label for="lastname">Last Name</label>
<input type="text" class="form-control" id="lastname" name="lastname" placeholder="Last Name" minlength="2" maxlength="45" required="required" pattern="[A-zÀ-ž]([A-zÀ-ž\s]){2,}"></div>
<div class="form-group col-12 col-xl-6">
<label for="email">Email</label>
<input type="email" class="form-control" id="email" name="email" placeholder="Email" required="required"></div>
<div class="form-group col-12 col-xl-6">
<label for="city">City</label>
<input type="text" class="form-control" id="city" name="city" placeholder="City" minlength="2" maxlength="45" required="required" pattern="[A-zÀ-ž]([A-zÀ-ž\s]){2,}"></div>
<div class="form-group col-12 col-xl-6">
<label for="state">State</label>
<input type="text" class="form-control" id="state" name="state" placeholder="State" minlength="2" maxlength="45" required="required"></div>
<div class="form-group col-12 col-xl-6">
<label for="country">Country</label>
<input type="text" class="form-control" id="country" name="country" placeholder="Country" minlength="2" maxlength="45" required="required"></div>
</div><!--// close form-row 1-->
</fieldset><!--// close fieldset 1-->
<fieldset>
<h2 class="text-center mb-3">Application Information</h2>
<div class="text-center mb-4"><p>Please read our course Welcome pages before signing for our courses. Note that our courses involve a lot of homework and thus require a major time commitment. </p></div>
<div class="form-row">
<div class="form-group col-12">
<label for="cmessage">Your Tech Background</label>
<textarea class="form-control" id="cmessage" name="message" placeholder="Do you have any current or past websites? Could you share the URLs?" rows="10" required="required"></textarea></div>
<div class="form-group col-12">
<label for="cmessage">Your Reasons for wanting to take our courses</label>
<textarea class="form-control" id="cmessage" name="message" placeholder="Please describe which courses you are interested in taking and why you are interested in taking them. What are your short term and long term goals?" rows="10" required="required"></textarea></div>
<div class="form-group col-12">
<label for="cmessage">Time available to devote to courses</label>
<textarea class="form-control" id="cmessage" name="message" placeholder="Confirm you have at least two hours a week to complete homework assignments plus two additional hours to attend course video conference sessions." rows="10" required="required"></textarea></div>
<input type="hidden" id="sesskey" name="sesskey" value="">
<script>document.getElementById('sesskey').value = M.cfg.sesskey;</script>
<div class="form-group col-12">
<input type="submit" name="submit" id="submit" value="Send" class="btn btn-block btn-primary py-2"></div>
</div><!--// close form-row 2-->
</fieldset><!--// close fieldset 2-->
</form><!--//close application-form-->
</div> </div> </div> </div>
</body></html>
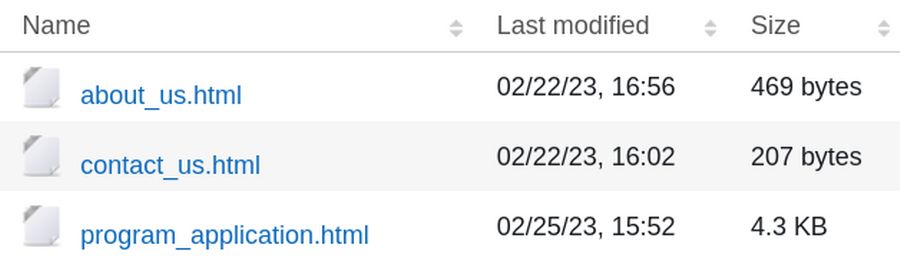
You can then save the file as program_application.html. Alternately, you can just download the Program Application zipped file from our website Downloads page and then unzip the file. Either way, to to Site Administration, General and scroll to the bottom of the page to the Static Pages area. Click Settings.
Change Static Page Settings
There are three important changes we need to make to the Static Pages settings. For Data source of document title, change it from h1 tag to title tag. For Data Source for document heading, change it from h1 tag to title tag. The problem with use the h1 tag is that it leads to a double page heading. The solution to this problem is to simply not use the h1 tag – and remember to add a title tag to the head of your HTML document!
Then scroll down the page to Clean HTML code and change it from Yes to No. The problem with cleaning the code is that it can clean too much code to the point where the HTML form will not even work. Then click Save changes.
Load the Program Application Form
Go to General Static Pages and click Documents. Then drag the program_application.html file from your File Manager to to the box:
Then click Save changes.
Determine the Program Application Form URL
Go to General, Static Pages and click List of Static Pages. Click on the Program Application link to open the page. Here is the URL for our Program Application form:
https://collegeintheclouds.com/local/staticpage/view.php?page=program_application
One problem was that the label font size for our questions was too small. To increase the font size of the question labels, add the following to your theme custom CSS box:
label {font-size: 18px !important;}
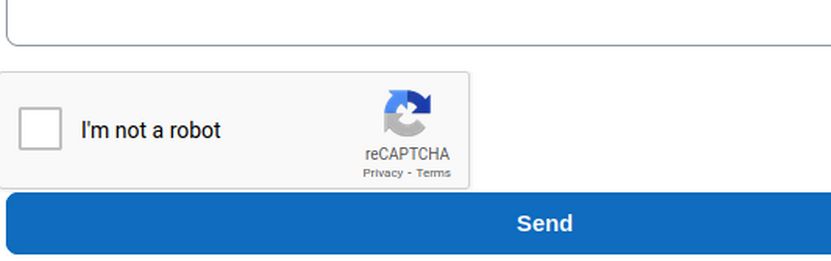
Add reCAPTCHA to Moodle HTML forms
Spam protection should be added to all Moodle registration forms with a CAPTCHA element - a challenge-response test used to determine whether the user is human. ReCAPTCHA keys need to be obtained so that they can be set in the Manage authentication common settings.
Get ReCaptcha Keys
There are two keys, the Site Key and the Secret Key. The Site Key and the Secret Key are also known as public and private keys. You can obtain these keys by registering your site with Google’s reCAPTCHA service. The Site Key is used to render the reCAPTCHA within a page and the Secret Key is used for performing server-side validation. The keys are unique to the domain they are registered to. To get Recaptcha keys for your website, go to this Google page: https://www.google.com/recaptcha/about/
Then click on the Admin Console in the top menu. Enter your Gmail Address and password. Then click on the Plus sign in the top menu to create keys for a new website.
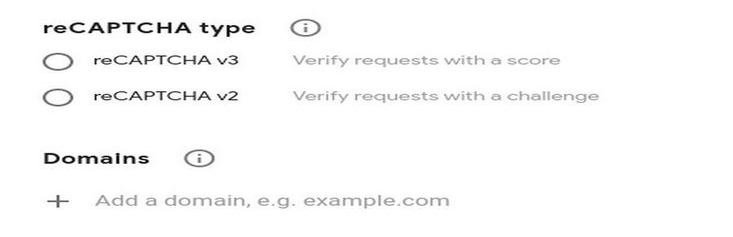
Type in the name of your website. Then check ReCaptcha 2. Then check Invisible ReCaptcha.
Then click to the right of the plus sign to add the domain name again. Then check the Accept Terms box. Then click Submit at the bottom of the page. Then copy and paste the Site Key and the Secret Key to a document in your Website Administration folder on your home computer. Then click the Back to Settings button and Click Save. Then close the browser window.
To add Recaptcha to your Moodle forms, go to Site administration > Plugins > Authentication > Manage Authentication. Scroll to the bottom of the page. Copy and paste the keys and click Save. Then enable Recaptcha by going to Site administration, Plugins, Authentication, Email Based Self Registration. Then change Enable ReCaptcha from No to Yes. Then click Save Changes.
Add Recaptcha to your Program Application Form
First, you need to download and install the Moodle Filter Codes Plugin. Then go to Plugins, Filters, Manage Filters and scroll down to Filter Codes. Change it from Disabled to On. Then click Filter Code settings and change Narrow Page from No to Yes. Then scroll to the bottom and click Save changes.
Assuming you have installed the Filter Codes plugin, adding Recaptcha is just a matter of adding a single line to your program_application.html form. Open the Program Application form with a text editor and scroll to the bottom. Just above the hidden input line (which is about line 65) add this tag: {recapture}
Then save the file. Then go to Site Administration, General, Static Pages, Documents. Delete the original Program Application file and then drag the new Program Application file from your File Manager into the Documents box. Then click Save changes. Then open a browser, scroll to the bottom of the form and view the result.
Create a Menu Item for our Program Application form
We next need to create a menu item in our Main Menu which our website visitors can click on to open the Program Application form. Go to Site Administration, Appearance, Themes. Then click the Almondb theme and click Front Page, Header Choice. Scroll down to the Front Page Nav Link box and add the following line:
Program Application|https://collegeintheclouds.com/local/staticpage/view.php?page=program_application
Then click Save changes. Then click on the Home Page to view the result:

Note: If you click on the Application menu item while you are logged in, you will not see the Captcha at the bottom of the form. You will only see it if you view the website as a non-logged in visitor.
What about Self Registration?
We will not cover the Self Registration process because it is very well covered in the normal Moodle documentation. However, I am not aware of any school that accepts students without requiring that they fill out a Program Application form.
What’s Next?
In our next article, we will set up a Payment Gateway which is required to set up a Course Registration process when students are paying for a course.