
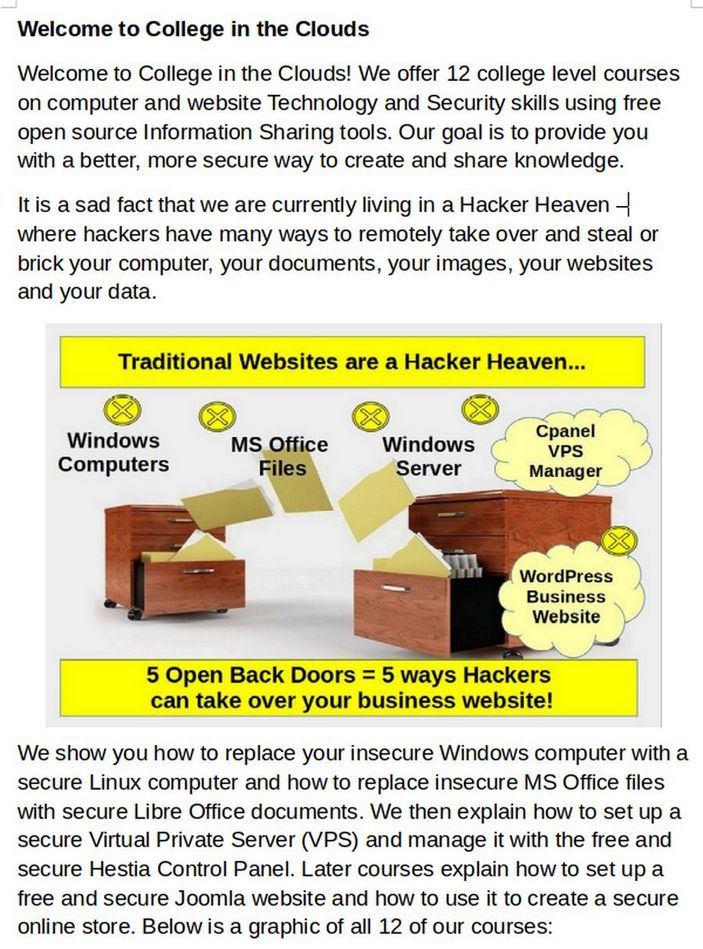
In our previous two articles, we installed a free Moodle theme called AlmondB and added a custom slideshow to the Home page. In this article, we will finish customizing our Moodle website home page.
Set the Home Page Structure
Here is what our Moodle website Home page currently looks like:
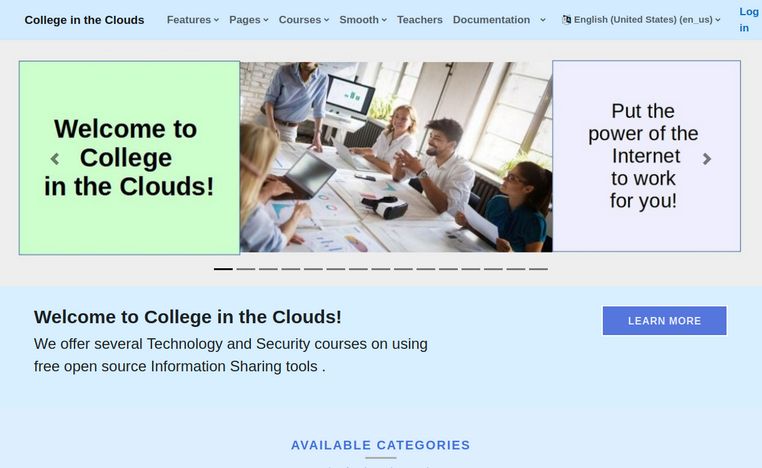
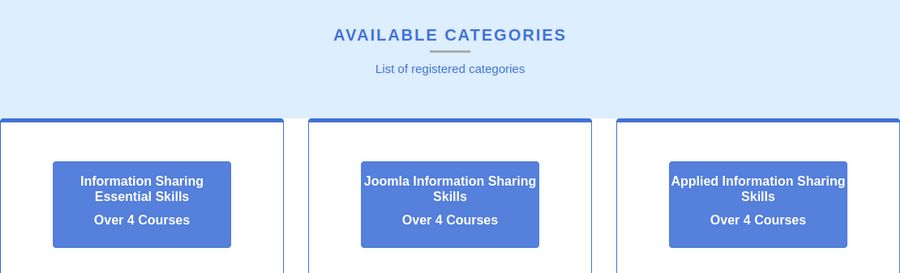
There is a main menu at the top of the page (which we will configure in our next article). This is followed by the Slideshow we set up in our last article. Below the slideshow is an area called Title Box – where we will next create our Welcome article. Below this is a Box called Available Categories. We will explain these categories in our Welcome article. Scroll down the page to see these categories.
Below the three categories is a Features box called We are Themes Almond which has six boxes:
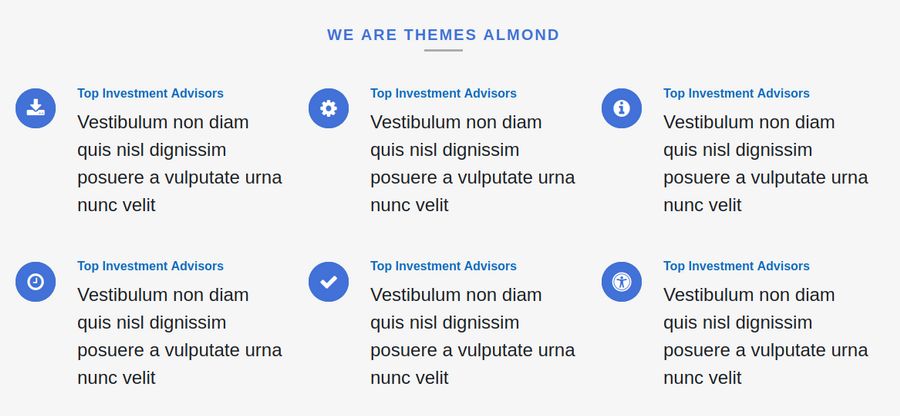
We will customize this Features block after we post our Welcome article. Below the Features box is a box called Available Courses.
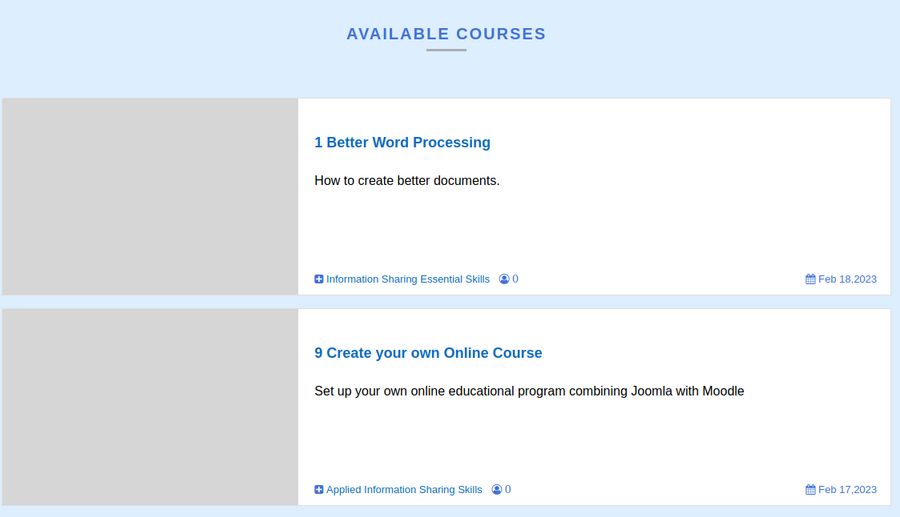
We will add images to these courses after customizing the Features block. The final box is a footer menu which we will customize in our next article which is focused on customizing Moodle Menus.
There are additional blocks which we deactivated in our first article.
To see all of these blocks, log into your Moodle Website and click on your Profile, then Site Administration, Appearance, Themes, AlmondB. Then click the Block tab:

There are 15 blocks to choose from. We have disabled blocks 2, 4 and 5. So the 4 blocks shown are 1 (title box), 9 (categories) 3 (Features) 7 (available courses) and 20 (Footer).
Change Block Order
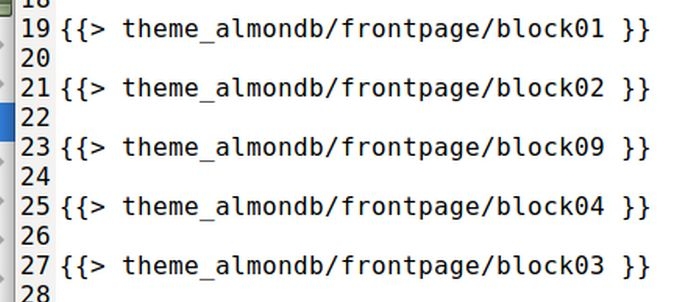
Note that these blocks are not displayed in their numerical order. Let’s change the order so that our Features block 3 appears above the Categories block 9. Log into your VPS and go to your Moodle User account. Click Files, Web, Domain Name, Public HTML, Themes, AlmondB. Click templates, frontpage. Then click on the frontpage 1 file to download it. Create a folder called AlmondB Moodle theme files. Then move the downloaded file to this folder. Copy the file frontpage_1.mustache and rename the copy old_frontpage_1.mustache. Then open frontpage_1.mustache with a text editor. Here is the default front page block order: 1, 2, 9, 4, 3, 7, 8, 5, 6, 10, 11, 18, 19, 20.
To change the order so that 3 comes after 2 and before 9, copy line 27. Then create a couple of new lines below line 21 and paste this line into the new line 23. Then delete the original block 3 line which is now line 29. Here is the result:
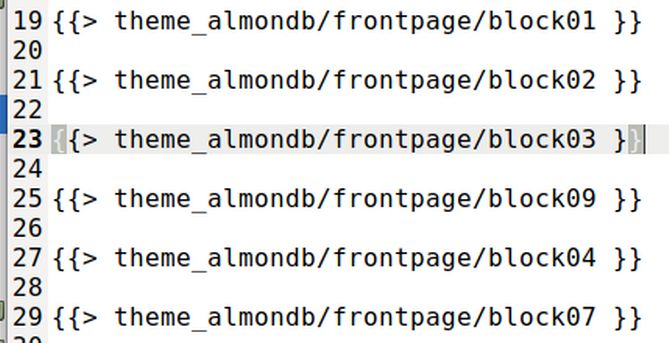
Block 3 is now above Block 9. Click Save and then close the file. Then in your VPS Moodle files theme, almondb, templates, frontpage screen, delete the frontpage_1.mustache file. Then click Add to find and add our new custom frontpage_1.mustache file. Then close the VPS file manager and close the VPS.
In your Moodle Site administration, click Development, Purge Caches, Purge all caches. Then view the result.
Write and Post your Home Page Welcome Article
Hopefully, you have already read our course and or book on how to create a secure website – which includes an article on how to write and post a welcome article for a Joomla website. The process for a writing a welcome article for a Moodle website is similar – except that the Moodle Media Manager (file manager) is harder to work with.
You start by creating a website folder with your home computer file manager. Then in this folder create three folders called articles, images and extensions. Then open Libre Writer and create a new Writer document called Welcome to our website and place the document in your website articles folder. It is important to use a Libre Writer document to write your article and optimize the images.
Then create a Text Only copy of your Welcome article – replacing each image with an image number and saving each image to an images folder on your Home computer.
In Joomla, we would then load our images with the Joomla Media Manager. But the Media Manager for Moodle, called File Picker is not very useful for updating images over time. The links created are also very bad. To make image links easier and to allow better organization over time, we will create an images folder to our Moodle website. Log into your VPS and go to your Moodle User. Then click Files, web, domain name, public HTML. Then click New then click Folder to create a new folder called images:
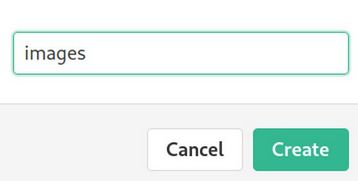
Click Create. Then open the images folder.
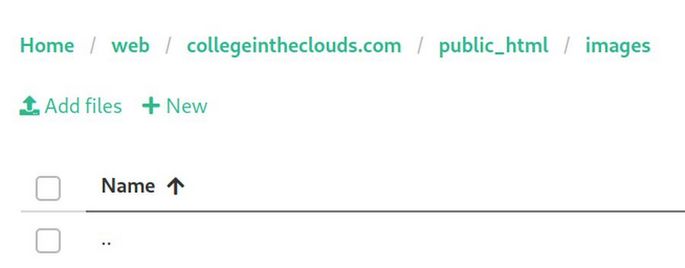
Click Add files. Select your Title box images.
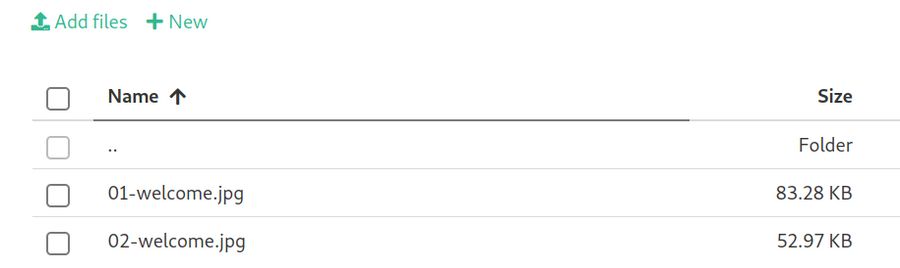
Now the link to these image files is just the link to the home page followed by forward slash images. Then forward slash followed by the image file name. Here are our links:
https://collegeintheclouds.com/images/01-welcome.jpg
https://collegeintheclouds.com/images/02-welcome.jpg
Optionally, you can create a short two minute video and post it to our course video channel. Then copy the embed code URL for the video. Here is the embed code for our Welcome video:
<iframe width="560" height="315" src="https://www.youtube.com/embed/yboWT4OwqEk" title="YouTube video player" frameborder="0" allow="accelerometer; autoplay; clipboard-write; encrypted-media; gyroscope; picture-in-picture; web-share" allowfullscreen></iframe>
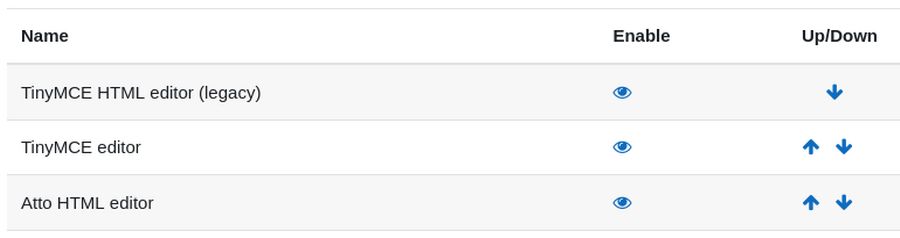
Next, we need to change our Moodle site to a better editor. The default editor, called Atto is missing several important functions. To change it to a better editor, called TinyMCE, go to Plugins, Text Editors. Then click Manage Editors. Use the arrows to move TinyMCE Legacy to the top of the list:
Next, in the AdmondB theme open the Title box. Scroll down to Block 1 caption to see the caption box and expand it. Here is the TinyMCE editor:

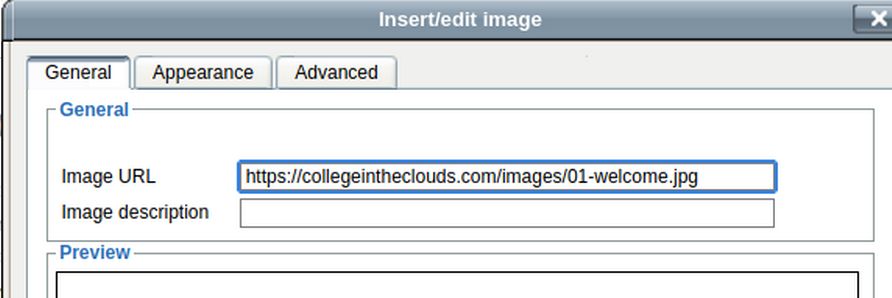
Use Control plus V on your keyboard to paste the Text Only version of your Welcome article into the expanded workspace. Then delete the image placeholder number and click on the image icon in the editor. This brings up a window where the only option is to enter a URL. Copy paste the URL for our first welcome image:
Click Appearance.
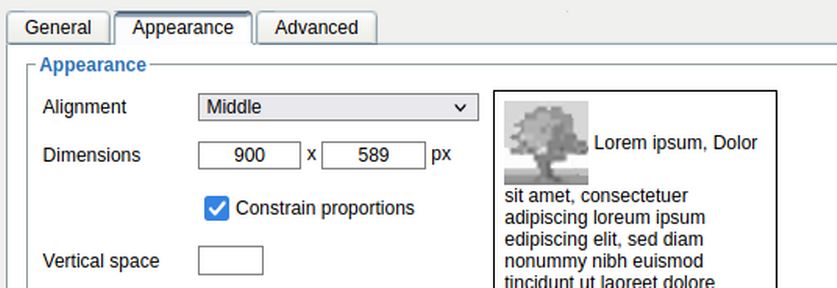
The only option is a fixed width. There is no way to initially get rid of pixels. So just click Insert. Then right click on the image and click Edit Image. Change the width to 80% and the height to auto.
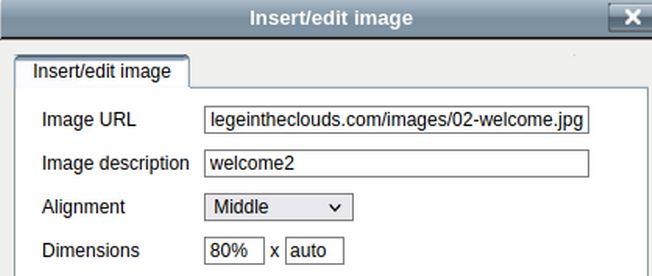
Then click Update. Then right click on the image again and select Align Center. Repeat the process for the second image. Then hide the Learn More button text and link to make the article full width. Then save changes and click on the Home Page to view the result.
Add your optional welcome video
Back in the title box editor, click the upper left icon called Toolbar Toggle. This displays two more rows of functions:

Click View Source Code which is just to the right of Font Size.
This opens a window where we can paste the embedded link to our Welcome video. Then select and center the video. Then click Save changes and view the result.

Edit the Features Block
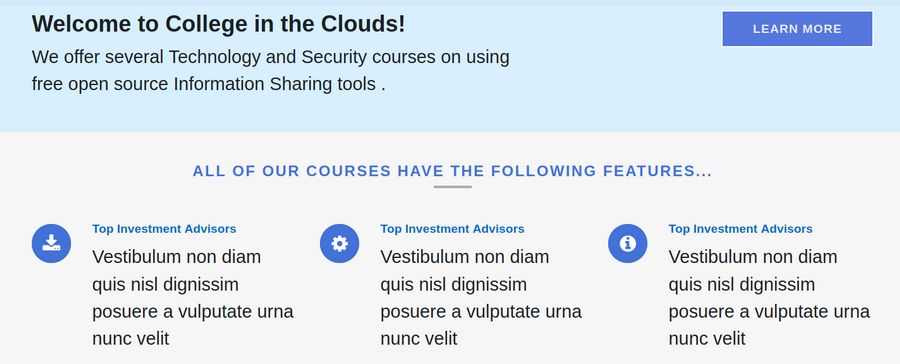
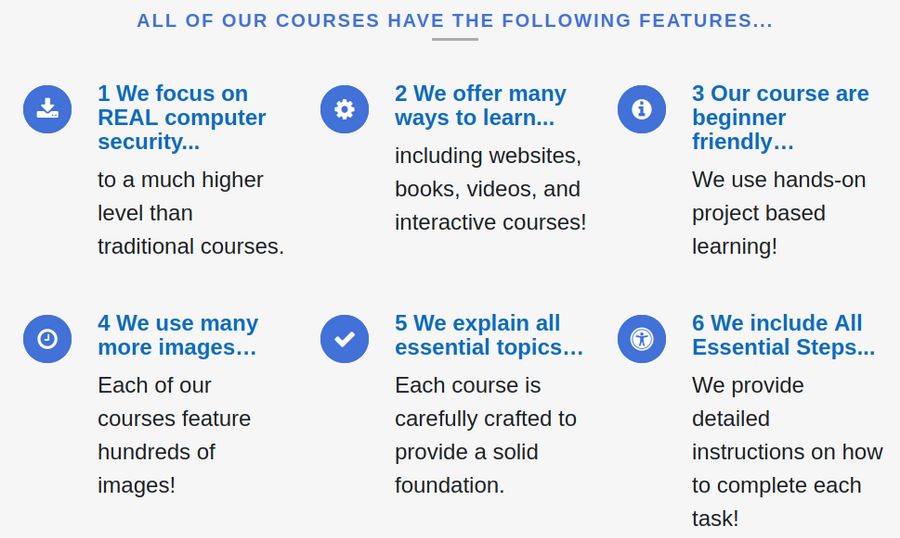
Click on Block 3 Features. Features has 3 design options. We will stick with the first 1. For Block 3 Header, type: ALL OF OUR COURSES HAVE THE FOLLOWING FEATURES...
We next need titles and captions (descriptions) for our 6 features:
|
Title |
Caption Description |
|
1 We focus on REAL computer security... |
to a much higher level than traditional courses. |
|
2 We offer many ways to learn... |
including websites, books, videos, and interactive courses! |
|
3 Our course are beginner friendly… |
We use hands-on project based learning! |
|
4 We use many more images… |
Each of our courses feature hundreds of images! |
|
5 We explain all essential topics… |
Each course is carefully crafted to provide a solid foundation. |
|
6 We include All Essential Steps... |
We provide detailed instructions on how to complete each task! |
Then save changes and view the result.
We need to make the titles bigger. Using the Firefox inspector, we can see that each title is wrapped in an h6 tag which has font size 16. We should therefore add the following to our custom css:
.item-content h6 {font-size: 24px !important; line-height: 26px;}
Change the URL to our curriculum website
https://collegeintheclouds.org/
Change the icons: 1 star 2 plus 3 smile 4 image 5 check 6 grad cap
Fix the Categories Block
Change Available Categories to Course Categories and change List to Three categories.
Fix the Courses Block
Change Available Courses to Course Options and increase the number of courses to 12. Hide the button. Create Images for each course with a width of 880 and a height of 560. To add a course image to a course, turn on Edit Mode. Then click on the course and click Settings. Then scroll down to the Course Image box and drag the image from your file manager to the box. Then click Save and display.
Here is what the course image looks like on the Course Page:

Here is what the course image looks like on the Home page:
Here is what the image looks like on the My Courses page:
Sadly, the courses are displayed in the order they are edited with the last edited course -12- displayed first. To place these so the first course is displayed at the top, click on Course 11 and click Settings. Then save it. Then click Course 10, settings and save it. Repeat until Course 1 is shown at the top of the list.
What’s Next?
In our next article, we will add some custom pages and then customize the Home page main menu and bottom menu.