4.4 Add Custom Pages and Menu Items

The AlmondB theme comes with a special plugin to add custom pages to a Moodle website. However, this plugin does not seem to work with the free version of the AlmondB theme. Thankfully, there is another Moodle plugin which is perhaps even better called Static Pages. In this article, we will install and use the Static Pages plugin to create two special pages – a Contact Us page and an About Us page. You can use this process to easily create your own custom pages. We will then customize the Home page top and bottom menus.

Install the Static Page Plugin
To download the Static Page plugin, go to this page:

https://moodle.org/plugins/local_staticpage

Click Versions and download the latest version. Then install it with the Moodle installer. The install ends in the Static Pages New Settings screen. There are three important changes we need to make to the Static Pages settings. For Data source of document title, change it from h1 tag to title tag. For Data Source for document heading, change it from h1 tag to title tag. The problem with use the h1 tag is that it leads to a double page heading. The solution to this problem is to simply not use the h1 tag – and remember to add a title tag to the head of your HTML document!

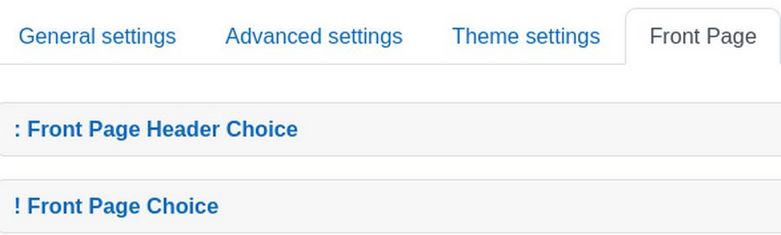
Then scroll down the page to Clean HTML code and change it from Yes to No. The problem with cleaning the code is that it can clean too much code to the point where the HTML form will not even work. Then click Save changes. Then skip the Notifications screen and click the General tab and scroll to the bottom of the screen:

01

Click Documents. This is an extremely simple screen that only accepts HTML documents. In other words, it only accepts documents that end in the dot html format.

02

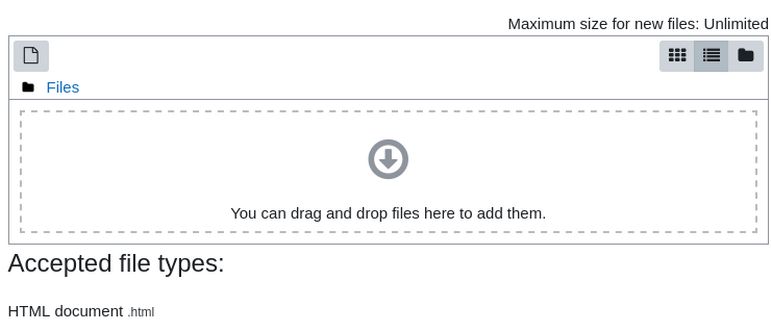
On this page, you drag and drop as many HTML documents as you want. Each HTML document will become its own static page with a link that can be posted in a Moodle or Joomla menu.

4.3 Finish Customizing our Home Page

In our previous two articles, we installed a free Moodle theme called AlmondB and added a custom slideshow to the Home page. In this article, we will finish customizing our Moodle website home page.

Set the Home Page Structure
Here is what our Moodle website Home page currently looks like:

01

There is a main menu at the top of the page (which we will configure in our next article). This is followed by the Slideshow we set up in our last article. Below the slideshow is an area called Title Box – where we will next create our Welcome article. Below this is a Box called Available Categories. We will explain these categories in our Welcome article. Scroll down the page to see these categories.

02

Below the three categories is a Features box called We are Themes Almond which has six boxes:

03

We will customize this Features block after we post our Welcome article. Below the Features box is a box called Available Courses.

04

We will add images to these courses after customizing the Features block. The final box is a footer menu which we will customize in our next article which is focused on customizing Moodle Menus.

4.2 Customize your Home Page Slideshow

In our previous article, we installed the AlmondB theme and changed the Title box. In this article, we will edit the Home Page slideshow.

Importance of a Home Page Slideshow
Adding a slideshow to the top of your Home page turns your website from a static website to a dynamic website. Many viewers will stay on your website and watch an interesting slideshow – even if they won’t take the time to read your Home page Welcome article. One of the reasons we chose the AlmondB theme is that it comes with a Home Page slideshow. Here we will review the steps to replace the AlmondB images with your own custom images. But before we do that, we will first review how to move the main menu from below the Slideshow to the top of the page above the slideshow.

Move the Main Menu to the top of the Home page
In the AlmondB theme settings, click on the Front Page tab.

01

Click on Front Page Header Option to reveal some hidden options.

02

There are three header options. Number 1 places the main menu below the slider. Number 2 places the main menu above the slider. Number 3 is like Number 2 but adds a bar above the main menu with the site name and contact information. Click Option 2.

03

Then choose a Nav bar background color such as #DDEEFF. Then click Save changes.

Increase the Number of Slideshow Images
In the AlmondB theme settings, click on the Slider tab.

4.1 How to Choose and Install a Moodle Custom Theme

Moodle themes are used to control the appearance of your Moodle Site. Moodle themes are similar to Joomla templates. They control the layout of content and the color of content as well as the appearance of titles and text. In this article, we will explain why and how to replace the default Moodle theme with a better theme. We will then install a free theme called AlmondB.

Here is an image of the AlmondB theme demo Home page:

01

Drawbacks of Using the Default Moodle Theme
The default Moodle theme, called Boost, suffers from a limited number of positions to place Moodle Blocks. This means that Moodle web pages that use the default theme often have blank spaces in the main content area while having too many blocks in the right side column. The default Moodle theme also has very limited menu options. Often important menu items are hidden - making it hard for teachers and students to find the Moodle functions they are looking for. Using a better theme will make your Moodle website easier to navigate as well as better looking and easier to read.

Drawbacks of Using a Custom Moodle Theme
Despite the drawbacks of the default Moodle theme, many teachers elect to use it anyway because using a custom theme adds even more complexity to running your Moodle website.

Not only do you need to learn how to run Moodle, but you also need to learn how to configure your custom Moodle Theme. This can be a challenge because most custom Moodle themes come with almost no instructions on how to configure them.

A second drawback of custom Moodle themes is that you are entirely dependent on the person who made the custom theme to keep the theme up to data. This can be a very daunting task because each time Moodle issues an update, the person who created the custom theme needs to review all of the changes to the Moodle code and then update their custom theme so it works with the new version of Moodle. New versions of Moodle are released every six months.

To make matters worse, Moodle is made with a program called PHP which is rapidly evolving. PHP runs 82% of all websites on the Internet including all Moodle sites, all Wordpress sites and all Joomla sites. PHP 7 was retired in November 2022 and PHP 8.0 will be retired in November 2023. Each time PHP releases a new version, many PHP functions are replaced with newer more secure functions. This forces Moodle to issue an update - which forces Moodle custom theme creators to issue an update. So we need a custom theme that works with Moodle 4.1 and PHP 8.1.

Theme Selection Factor #1 - has the Theme been updated for the latest version of Moodle?
Go to the Moodle Plugins Themes page: https://moodle.org/plugins/browse.php?list=category&id=3

This will display all themes in the order that they were updated. For each theme, click on the theme to go to the Theme page. Then click on Versions to see if the theme has been updated to the latest Moodle version (which is currently version 4.1). The Themes page also provides a summary of the features of each theme.