
In our previous article, we installed the AlmondB theme and changed the Title box. In this article, we will edit the Home Page slideshow.
Importance of a Home Page Slideshow
Adding a slideshow to the top of your Home page turns your website from a static website to a dynamic website. Many viewers will stay on your website and watch an interesting slideshow – even if they won’t take the time to read your Home page Welcome article. One of the reasons we chose the AlmondB theme is that it comes with a Home Page slideshow. Here we will review the steps to replace the AlmondB images with your own custom images. But before we do that, we will first review how to move the main menu from below the Slideshow to the top of the page above the slideshow.
Move the Main Menu to the top of the Home page
In the AlmondB theme settings, click on the Front Page tab.
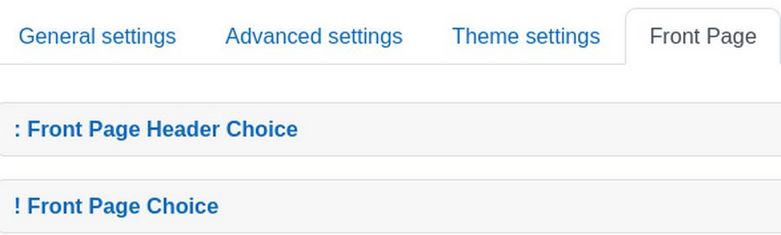
Click on Front Page Header Option to reveal some hidden options.
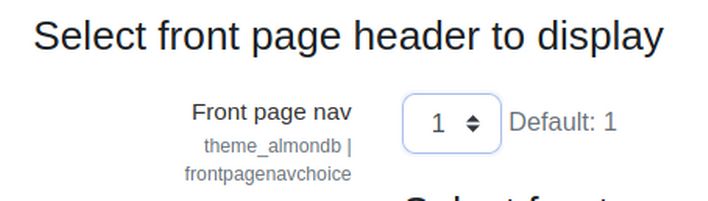
There are three header options. Number 1 places the main menu below the slider. Number 2 places the main menu above the slider. Number 3 is like Number 2 but adds a bar above the main menu with the site name and contact information. Click Option 2.

Then choose a Nav bar background color such as #DDEEFF. Then click Save changes.
Increase the Number of Slideshow Images
In the AlmondB theme settings, click on the Slider tab.
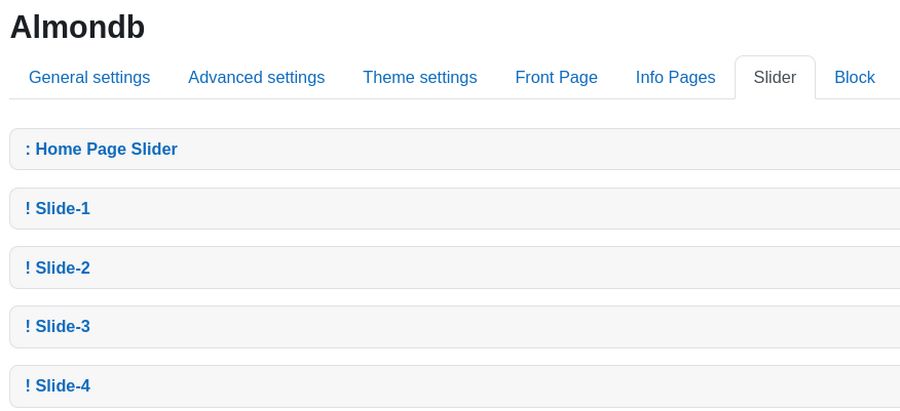
Then click the Home Page Slider to reveal some hidden options:
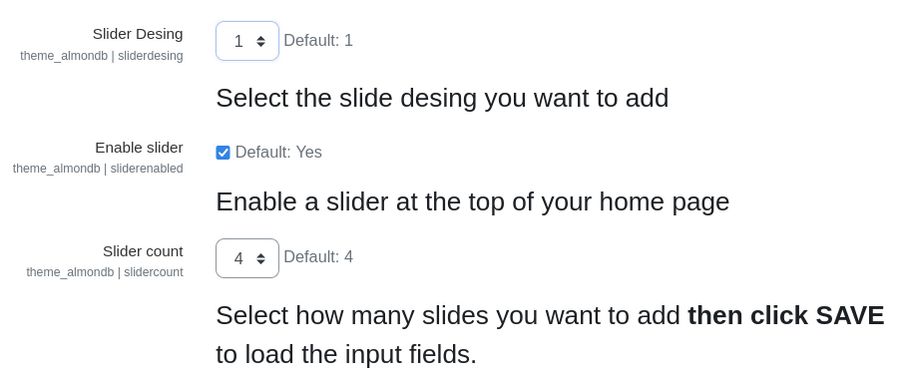
There are 4 slider design options. Default is number 1. Option 1 has a lighter image, navigation arrows and a button. Option 2 has a darker image (for using light text overlay) and navigation arrows and button. Option 3 has no navigation arrows and no button: Option 4 has buttons on the left side. We will stick with Option 1.
Below this is an option called Slide Count. There are four slides but can be increased to six. Increase the number of images to 6. This is still not enough because we would like to have at least one image for each course plus we need a Welcome image and 2 closing images. Since we have 12 courses, we need 15 images. We will increase the number of images in a moment.
The Slideshow height is 550 and can be reduced to 300. Change the slideshow image height to 400. This will make the Home Page title box more visible and increase the image loading speed (to partially make up for the fact that we are increasing the number of images from 4 to 15). Then click on Slide 1. It says that the recommended size is 1500px by 500px. In fact, the default images are 1920 by 550 high. This is a ratio of 3.5 to 1. We will use a ratio of 3 to 1 and make our images 1200px wide by 400px high. Note that our Home page width is set to be less than 1200px to keep the web page more readable.
Click Save changes to close the Slideshow settings screen. Then take a close look at the default slideshow. Note that the image changes every 5 seconds. This is fine for images with no text. But if we add even a few words of text, 5 seconds is not enough time for our viewers to read the text. We will therefore increase the time for each slide display from 5 seconds to 8 seconds after we have increased the maximum number of images from 6 to 15. Note that 8 seconds times 15 slides is exactly two minutes for viewers to watch our entire slideshow.
To make these two changes, log into your VPS and then click on your Moodle website user account. Then click Files, Web, Domain Name, Public HTML. This will display all of our Moodle files.
Then click Themes and click the AlmondB theme to open its folder. Click the Settings folder. Then click slideshow.php to open it. Change line 55 from 7 to 16. This will increase the total number of possible slides to 15. Then save and close this file.
Increase the time delay between slides to 8 seconds
It is only slightly more complex to increase the time delay between slides. While still in the almondb theme folder, click on templates/frontpage/slider.mustache. This sadly will not open this file. Instead, the file will be downloaded to your home computer. Click on the downloaded file and open it with a text editor. Then change line 21 and line 52 from
<div id="carouselExampleCaptions" class="carousel slide " data-ride="carousel">
to
<div id="carouselExampleCaptions" class="carousel slide " data-ride="carousel" data-interval="8000">
In other words, carefully add data-interval="8000" just after the word carousel. Also change line 85 from 5000 to 8000. Then click Save and close the file. Then delete the existing file in your VPS file manager and click Add to add the edited file from your home computer to your VPS site file manager.
Then click a browser and view the site. Hopefully, the slides now each show for 8 seconds. Log in and change the number of images from 6 to 14. Then save the changes and log out of the site.
Use Libre Draw to Create each Slideshow image
Open your file manager and create a new folder inside of your website images folder. Name it Home Slideshow. Then open a blank Libre Draw document and name it 00-template. Click Page, Page properties. Change the Orientation to Landscape and width to 12 inches and height to 4 inches. Then reduce the margins to 0 inches as shown in the image below.
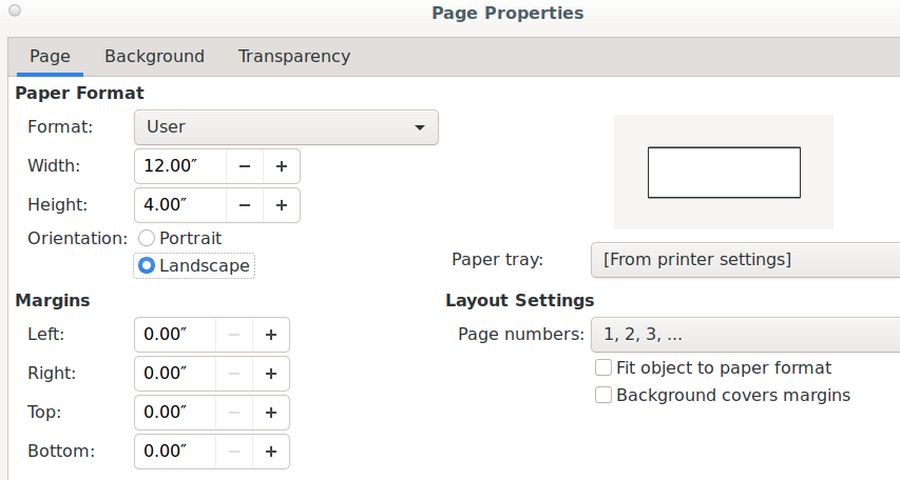
Then click on the Background tab and change the background to light gray (#eeeeee). Then save and close the Page properties screen. Click View, Zoom and change to Page Width. Here is the result:

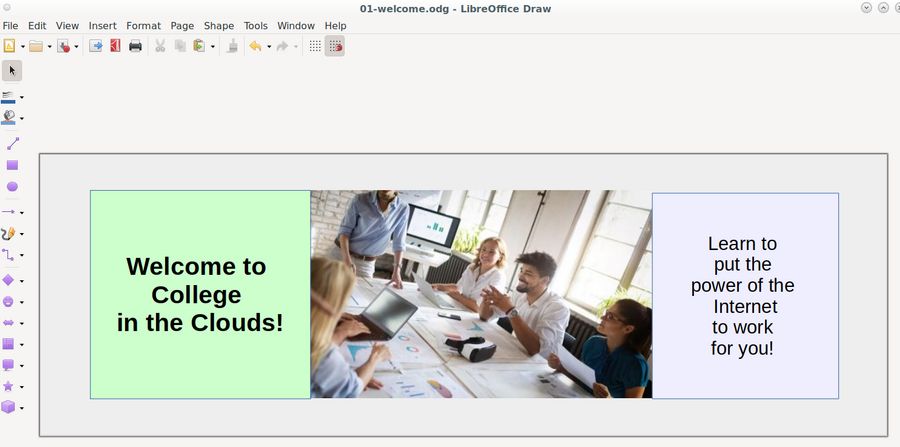
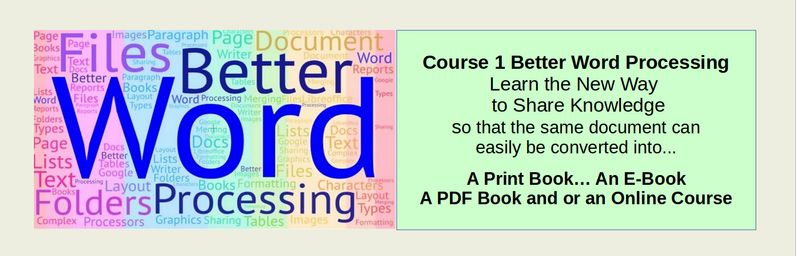
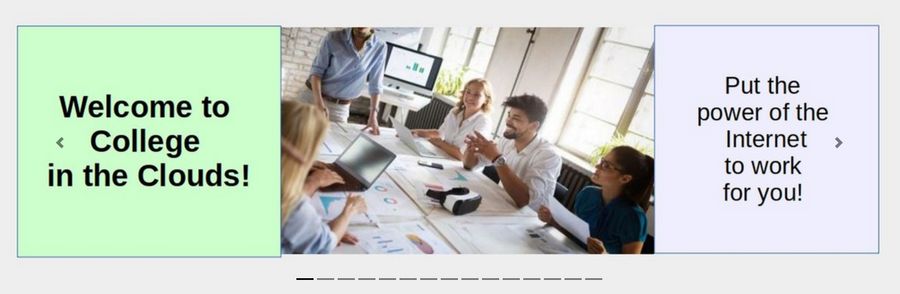
Then save the template as 01-welcome. Then add a couple of text boxes and an image – making sure to leave a very large margin around the edges.
Then open up a blank Libre Writer document and save it to your same images folder as Slideshow images compressed. Click Format page and change the Orientation to Landscape. Change the width to 13 inches and the height to 6 inches.
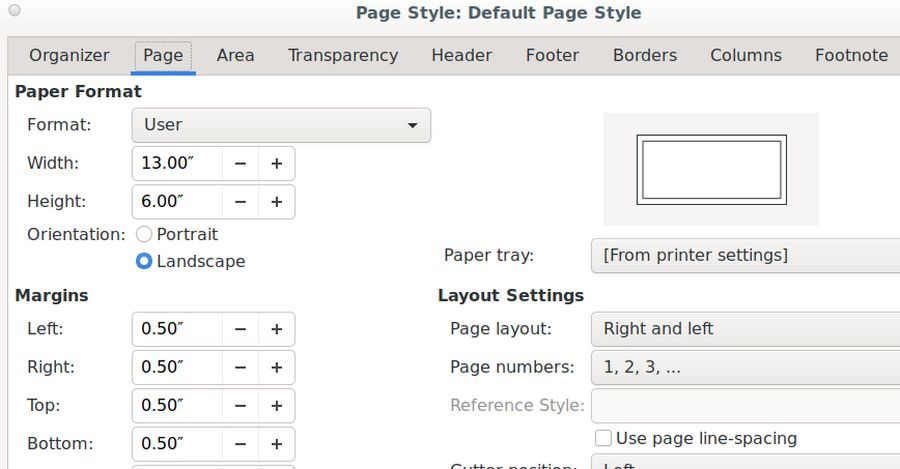
This will make the actual width 12 inches and the actual height 5 inches. Click OK. Then click View Zoom and change it to Optimal View. Next use Flameshot to capture the entire first image and border in your Libre draw 01-welcome document. Paste the image into your Libre Writer Home Slideshow Images compressed document. Below is the result:
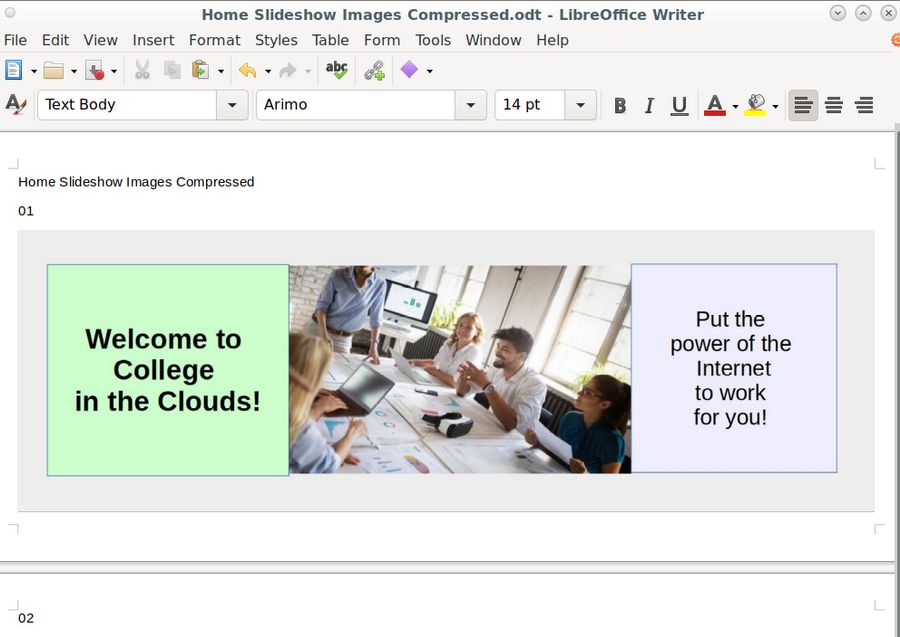
Then right click on the image and click Compress.
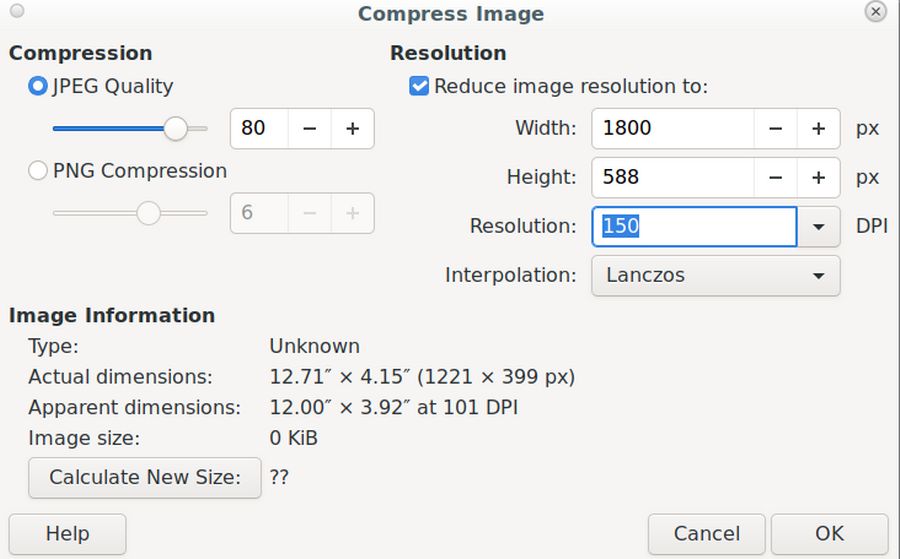
Change Compression to JPEG, check Reduce Resolution and change the resolution to 150 DPI. Then click OK. Create a folder in your website images folder called Home Slideshow. Then right click on the compressed image again and click Save. Name the image 01. Then click Save and OK. This will save the image as a JPEG image.
Repeat to create image 02
Save your Libre Draw template as 02-course-1. Add slides and text.
Use Flameshot to capture the image and paste it into your Writer document. Then right click and click Compress to compress it to 150-DPI JPEG. Then right click again and click Save to save it as image 02. Repeat the above process to create images for each course. Here is what our images folder looks like with 15 images in it:
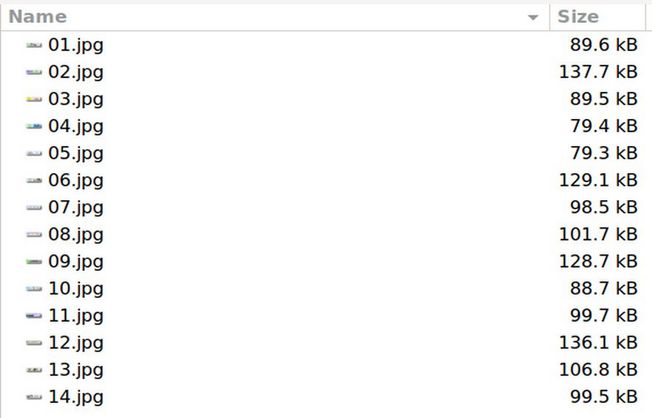
Ideally, each image should have a file size that is less than 150KB.
Change Gthumb to Light Background
We will next resize and crop the above images. The image editor we recommend for Linux Debian is called Gthumb. Gthumb comes with a black background which is greatly increases the file size of screen shots and is much harder to read than a light background. We will therefore change the Gthumb background to white. If you would like to do the same, here are the steps:
First, copy the gthumb file to your local folder: Open your file manager and go to File System /usr/share/applications. Copy the file called Gthumb. Then go to your Home folder and right click to display hidden files. Then open the .local/share/applications folder and paste the gthumb file into this folder.
Then edit the local version of Gthumb: Open the copied .desktop file using a text editor. Scroll down to Line 212 which looks like this: Exec=gthumb %U
Assuming you are using the Blue-mint theme, replace Line 212 with this: Exec=env GTK_THEME=Blue-mint:light gthumb %U
Save the gthumb.desktop file. Then open Gthumb.
Resize and Crop each image to precisely 1500px x 500px
It is important that each image in our slideshow have the exact same height and width. To achieve this, open the Gthumb Image editor and then use it to open the Home Page Slideshow folder.
Click on the first image to edit it.
Click on the Format, Resize button in the lower right corner. Then reduce the height to 400px. This will also reduce the width:
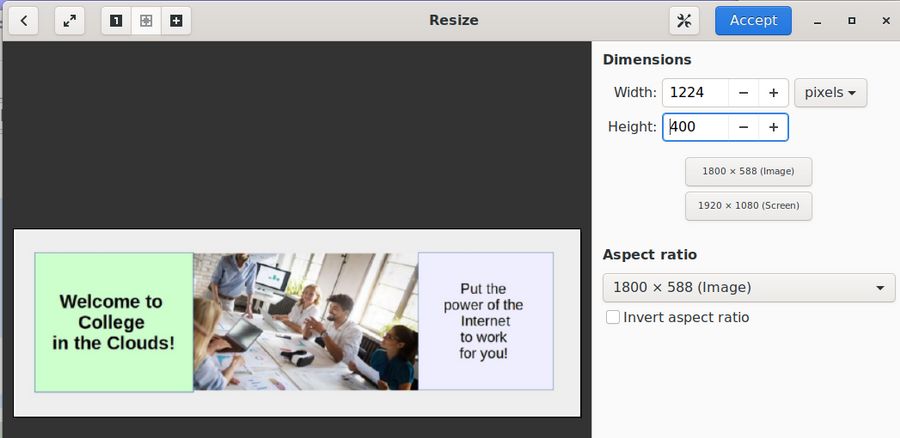
If the width is above 1200, then click Accept (and we will crop the width). However, if the width is below 1200. Therefore, increase the width to 1200 (which will increase the height). Then click Accept. Then click the Crop button which is to the right of the Resize button. Then click Maximize:
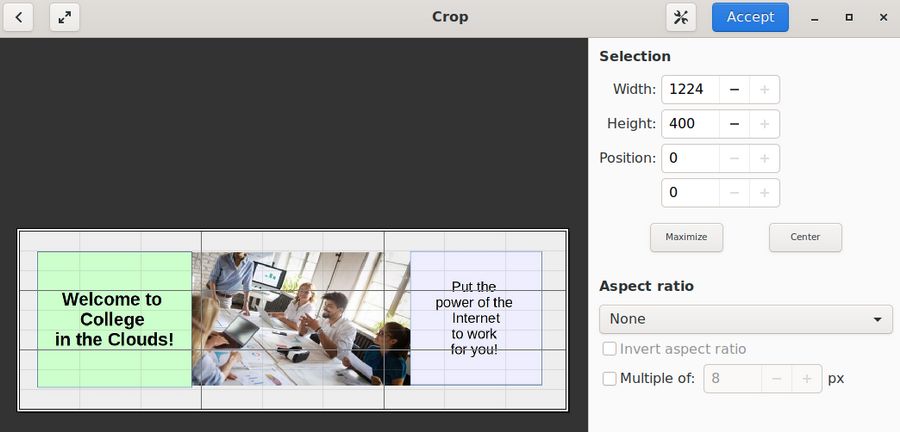
Reduce the width to 1200 by clicking on the minus sign. This will take 24 pixels off the right side the image. If you would rather take some of the crop off the left side, click on the Position Plus sign. Then click Accept.
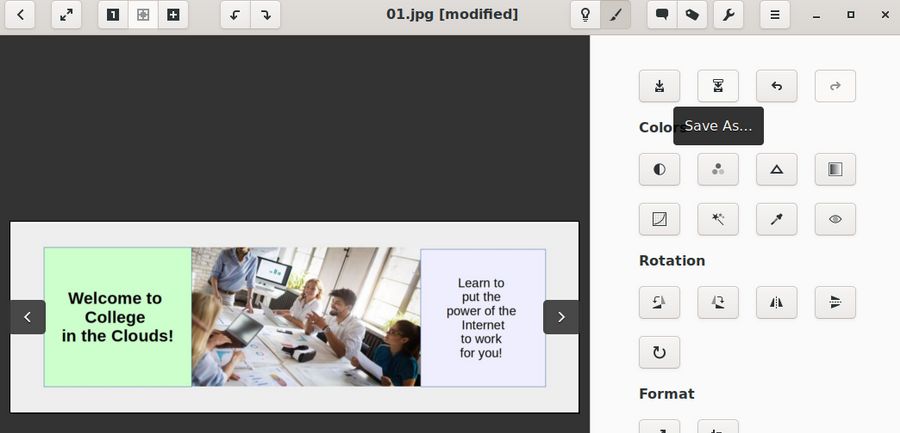
Then click the Save As button which is the second icon in the first row. A Save As screen will appear. Rename the file to
01-1200x400.jpeg
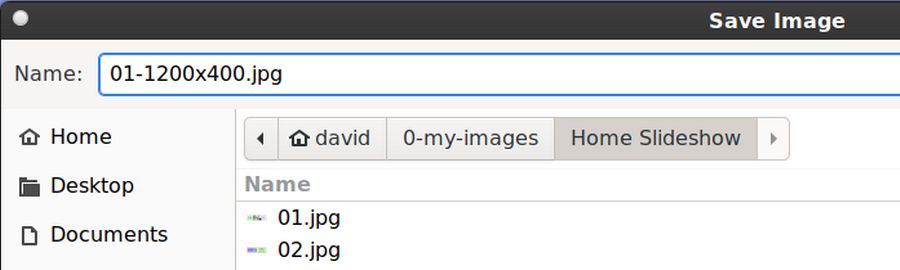
Click Save. Then Save again. Then click on the second image 02 to resize and crop it to 1200 x 400. Repeat to edit resize and crop all 15 images. Here is what our file manager images folder now looks like:
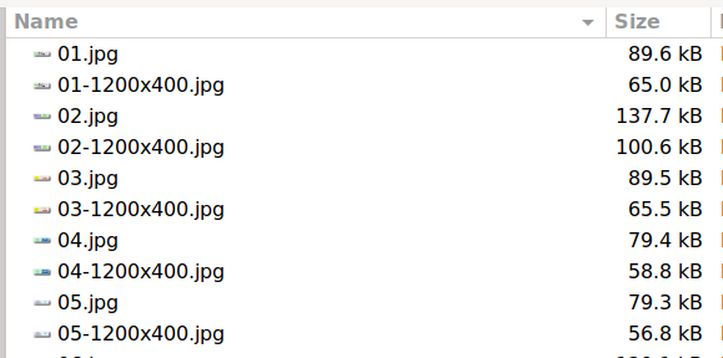
The average file size for our cropped images is now below 100KB.
Load Cropped Images to your AlmondB theme
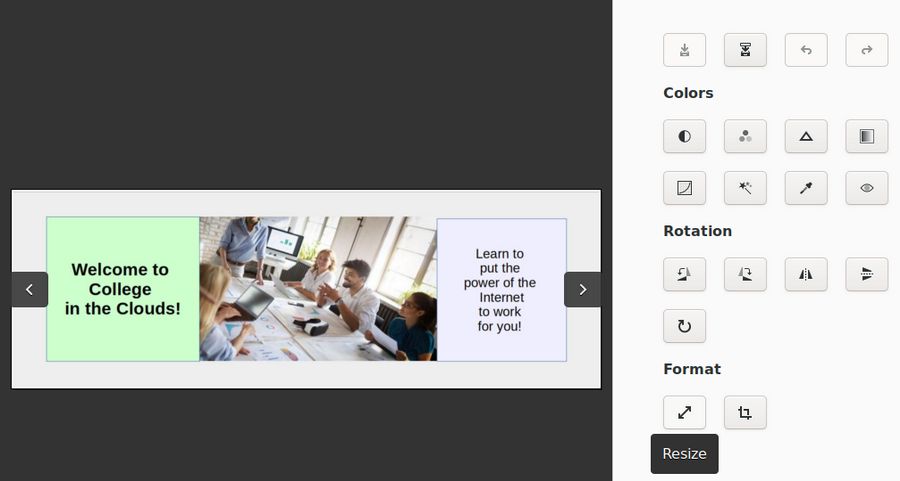
We are now ready to load our images to our Moodle website home page. Log in and go to your AlmondB theme. Then click Slider. Click on the Home Page Slider to make sure it is set for 15 images and the height is set for 400. Then click on Slide 1.
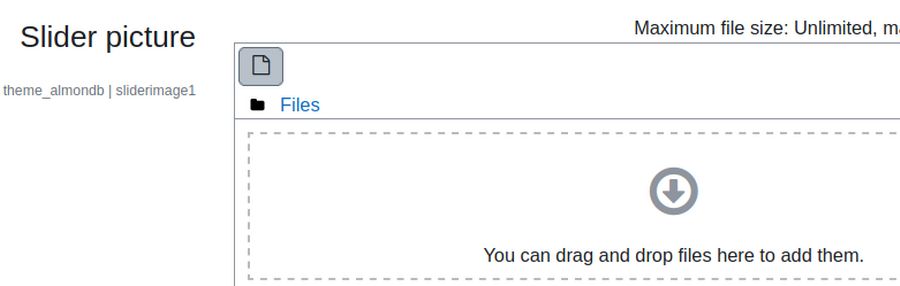
Open your file manager and drag the cropped version of image 01 into the box:

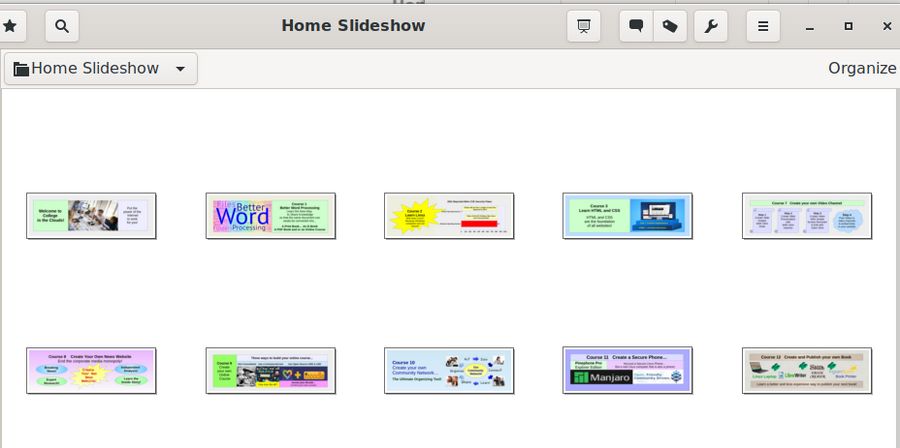
Scroll down and click Slide 2 to add its image. Repeat to add all 14 images. Then click Save changes and click Home to view the result:
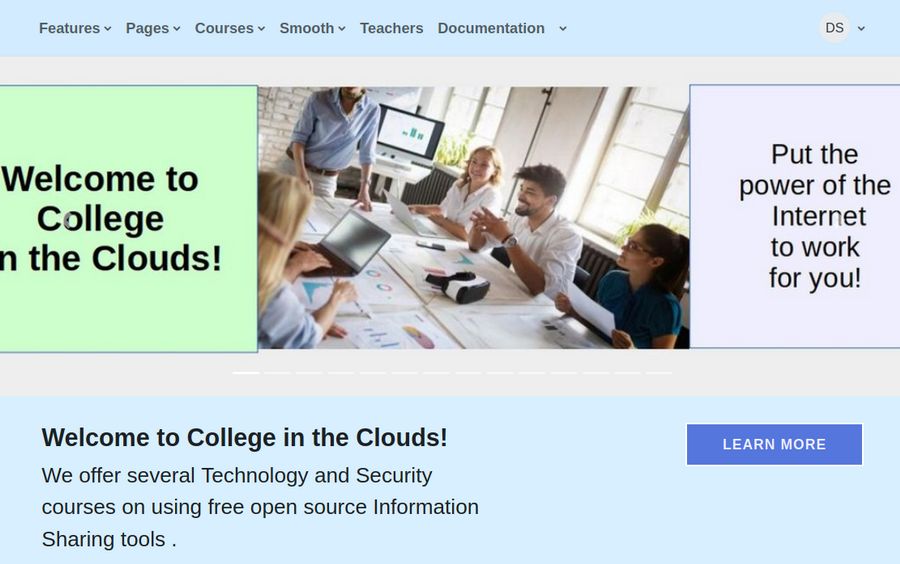
Vary the browser screen width. Note that the images are not responsive and do not display well on very narrow or very wide screens. The problem is that the AlmondB theme has fixed the height of the slideshow container to a specific number (in our case 400px). We need to change the height to “auto.” Using the Firefox inspector, there is a class called d-block that can help us do this. Go back to the AlmondB theme screen and click Advanced Settings. Add the following to the Raw SCSS box:
.d-block {height: auto;}
Then click Save changes. Then clear the cache and click Home to view the result. The images should now be responsive by shrinking or expanding to match the browser screen width.
Darken colors of next previous icon arrows and indicators
Sadly, the slide control icons are set to white – which can not be seen on light colored slides. To change these to black, add the following to our AlmondB theme Advanced Settings:
.carousel-control-prev-icon, .carousel-control-next-icon, .carousel-indicators {filter: invert(100%);}
Then click Save changes, clear the cache and view the result.
What’s Next?
In our next article, we will finish customizing our Home page.