course header 2000x350
Create Your Own Online Course
  • Home
  • First Steps
    • 1 Freedom to Teach
      • 1.1 Tour of the Moodle Back End
      • 1.2 How to Install Moodle on a Hestia VPS
      • 1.3 Use the Moodle Installer to Complete Installation
      • 1.4 Final Moodle Website Setup Tasks
    • 2 Structure your Moodle Website
      • 2.1 Customize Your Moodle Home Page
      • 2.2 Moodle Users Roles and Permissions
      • 2.3 Customize Moodle User Settings
      • 2.4 Create Moodle Categories and Courses
    • 3 Create your Moodle Course Content
      • 3.1 Organize your Content into Moodle Sections
      • 3.2 Add Activities and Resources to a Moodle Section
      • 3.3 Add Moodle Learning Blocks
      • 3.4 Provide a Predictable Class Structure
  • More Steps
    • 4 Improve Moodle Appearance
      • 4.1 How to Choose & Install a Moodle Custom Theme
      • 4.2 Customize your Home Page Slideshow
      • 4.3 Finish Customizing our Home Page
      • 4.4 Add Custom Pages and Menu Items
    • 5 Moodle Administrator Tasks
      • 5.1 Four Primary Moodle School Roles
      • 5.2 Moodle Program Registration
      • 5.3 Set Up a Moodle Payment Gateway
      • 5.4 Set Up Course Auto Enrollment
    • 6 Moodle Course Planning
      • 6.1 Moodle Course Planning
      • 6.2 Create a Lesson with Moodle
      • 6.3 Add a Moodle Calendar
      • 6.4 Moodle Small Group Appointments
  • Final Steps
    • 7 Evaluating Learning Progress
      • 7.1 Link Key Concepts to Quiz Questions
      • 7.2 Set up your Course Grade book
      • 7.3 Complete and Copy the Course Template
      • 7.4 Create an Annual Cycle of Courses
    • 8 Moodle Video Tips
      • 8.1 Create Course Slide Presentations
      • 8.2 Create and Post Course Videos
      • 8.3 Moodle Video Conferencing Tools
      • 8.4 Jitsi Video Conferencing Tips
    • 9 How to Backup and Update Moodle
      • 9.1 Create a Moodle Site Backup System
      • 9.2 Set Up a Moodle Test Site
      • 9.3 Update Moodle on your Test Site
      • 9.4 Make a Custom Moodle Student Guide
  1. You are here:  
  2. Home
  3. First Steps
  4. 3 Create your Moodle Course Content

3.4 Provide a Predictable Class Structure

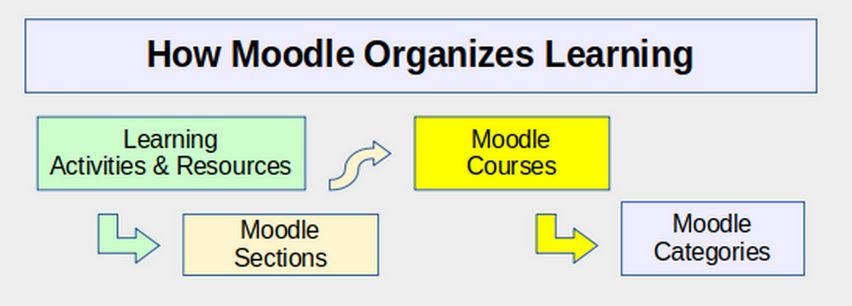
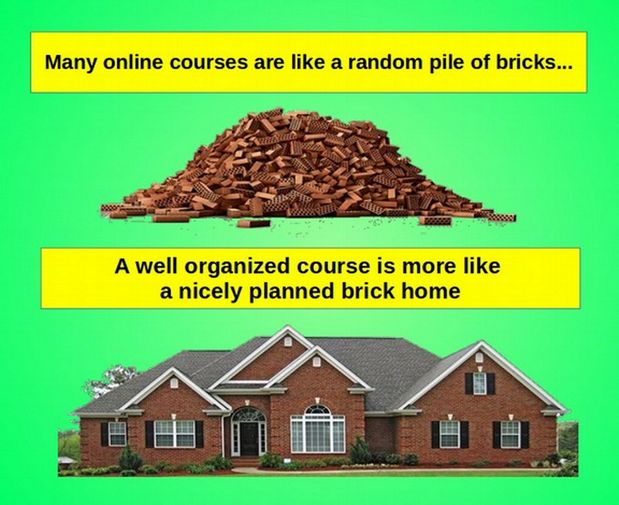
In this article, we will take a second more practical look at Moodle Resources and Activities in order to provide an example of how they can be combined into a predictable section or class structure. As a teacher, one of your greatest challenges is designing the curriculum for your course. Moodle offers so many options that there is a tendency to try to jam several options into the same course. But the problem with adding random Moodle activities to different class sections is that too much variety can confuse students. Your course can wind up turning into a pile of random learning bricks rather than providing your students with a well built house.

01

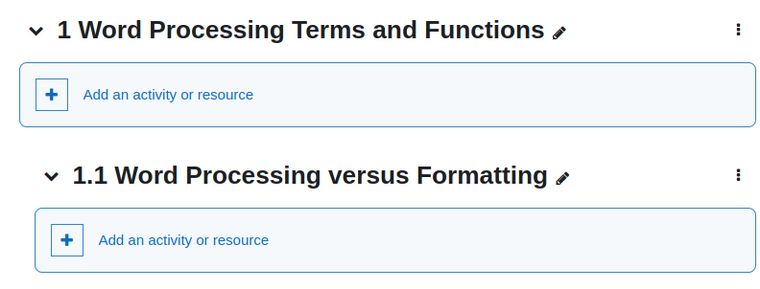
I therefore recommend starting with a simple and predictable class or section structure whereby each class follows a similar routine of Moodle resources and activities. Here is the course structure we use with most of our courses at College in the Clouds:

#1 Assignment Summary.
#2 Class or Section Reading.
#3 Class or Section Glossary of Terms.
#4 Class or Section Video.
#5 Class or Section Video Conferences.
#6 Class or Section Quiz.
#7 Class or Section Assignment (aka Mastery Project)
#8 Appointments with Individual Students.
#9 Student Project Demonstrations and/or Presentations

Let's take a closer look at each of these class or section elements.

Read more: 3.4 Provide a Predictable Class Structure

3.3 Add Moodle Learning Blocks

In addition to Moodle Resources and Activities, Moodle also offers 30 different kinds of learning blocks. Moodle blocks are boxes of content which can be added to the side of any page in Moodle. Some blocks can also be added to the main or middle content area of a Moodle course page. Click on Add Block in the Side Menu to display this list. Scroll down the list to see the entire list of 30 different learning blocks all organized in alphabetical order:

01

An administrator can manage Moodle's blocks for the site in Site administration > Plugins > Blocks > Manage blocks, including any contributed blocks that have been added.

02

Log in and go to your Dashboard to see several blocks on display:

03

There are two blocks in the main content area (Timeline and Calendar). Then in the right side menu, there is an additional block called Recently accessed items.

How to Hide Blocks on the Dashboard page
To hide some of the blocks on the Dashboard page, go to Site administration > Plugins > Blocks > Manage blocks. Scroll down to Online users. Then click on the EYE icon to hide the box. Then view the Dashboard again.

How to Add Blocks to the Dashboard page
To add a block to the Dashboard page, click turn Edit Mode on. This will bring up the Add Block Menu Item in center and right columns. Then click Add a Block. Click TEXT. Then scroll to the bottom of the Dashboard and click on the Block Edit wheel to add title and text.

Then in the Block Edit screen, click Where it appears and change the location from right to the main content area. Alternately, you can also just drag the box to where you want it to appear. Then click Save Changes. Then use the four arrows to move the block to the top of the page. Then turn off Edit Mode. Here is our revised custom dashboard:

Read more: 3.3 Add Moodle Learning Blocks

3.1 Organize your Course Content into Moodle Sections

In this article, we will explain how to structure your course into as many sections and sub-sections as you need and in a manner that will help students understand your course organization without being overwhelmed by having all content sections visible on the student's course Home page.

01

Each Part, when clicked on, displays 4 chapters - and each chapter when clicked on displays 4 sections. This helps the student understand that the course is divided into three parts and each part is divided into four chapters. Providing the student with this structure helps them understand their progress through the learning process.

02

Moodle organizes learning into Activities and Resources that are placed in Sections and Topics that are placed in Chapters that are placed in Categories.

A Moodle category is a group of related online courses. For example in the Science category you can have courses on Physics, Chemistry and Biology. A Moodle course is an online series of web pages where teachers can organize their course into a series of lessons which Moodle calls topics and then add learning materials, such as documents, videos and quizzes to each topic.

By default, only administrators and managers can create categories and courses. Once courses are created, and once you have added users to your Moodle website, you can then assign one of more users to the role of teachers to your new course. Teachers can then edit the default Moodle course structure and add more topics and add learning materials to each topic to create their own courses. Course pages can be hidden while they are being created. You can also choose a starting and ending date for your course.

Read more: 3.1 Organize your Course Content into Moodle Sections

3.2 Add Activities and Resources to a Moodle Section

In our previous article, we created the sections and sub sections for a new course called Better Word Processing. We then divided the course into three parts. We then divided each part into four chapters. Each chapter can be thought of as one week of course content. We then divided each chapter into four sections. Each section can be thought of as a single class session. Each class or section has its own web page, activities and resources. In this article, we will add activities and resources to the first section in Chapter 1. This section is called Section 1.1 Word Processing versus Formatting. The first step in adding activities and resources to a Moodle section is to go to the Course Section you want to work on and turn on edit mode.

01

Note that while we could add an activity to Chapter 1, our actual class sections are the sub-sections of Chapter 1. So go to Section 1.1 and click Add an activity or resource. This brings up a screen with 22 learning options. These options are divided into two categories. There are 15 Activities and 7 Resources. Click on Resources:

02

Review of 7 Moodle Resources

The first option is called Book. This option allows you to create a series of web pages all linked by a Table of Contents. You can include images videos and other content. Here is an image of what the Book might look like:

Read more: 3.2 Add Activities and Resources to a Moodle Section
  • Home
  • First Steps
    • 1 Freedom to Teach
      • 1.1 Tour of the Moodle Back End
      • 1.2 How to Install Moodle on a Hestia VPS
      • 1.3 Use the Moodle Installer to Complete Installation
      • 1.4 Final Moodle Website Setup Tasks
    • 2 Structure your Moodle Website
      • 2.1 Customize Your Moodle Home Page
      • 2.2 Moodle Users Roles and Permissions
      • 2.3 Customize Moodle User Settings
      • 2.4 Create Moodle Categories and Courses
    • 3 Create your Moodle Course Content
      • 3.1 Organize your Content into Moodle Sections
      • 3.2 Add Activities and Resources to a Moodle Section
      • 3.3 Add Moodle Learning Blocks
      • 3.4 Provide a Predictable Class Structure
  • More Steps
    • 4 Improve Moodle Appearance
      • 4.1 How to Choose & Install a Moodle Custom Theme
      • 4.2 Customize your Home Page Slideshow
      • 4.3 Finish Customizing our Home Page
      • 4.4 Add Custom Pages and Menu Items
    • 5 Moodle Administrator Tasks
      • 5.1 Four Primary Moodle School Roles
      • 5.2 Moodle Program Registration
      • 5.3 Set Up a Moodle Payment Gateway
      • 5.4 Set Up Course Auto Enrollment
    • 6 Moodle Course Planning
      • 6.1 Moodle Course Planning
      • 6.2 Create a Lesson with Moodle
      • 6.3 Add a Moodle Calendar
      • 6.4 Moodle Small Group Appointments
  • Final Steps
    • 7 Evaluating Learning Progress
      • 7.1 Link Key Concepts to Quiz Questions
      • 7.2 Set up your Course Grade book
      • 7.3 Complete and Copy the Course Template
      • 7.4 Create an Annual Cycle of Courses
    • 8 Moodle Video Tips
      • 8.1 Create Course Slide Presentations
      • 8.2 Create and Post Course Videos
      • 8.3 Moodle Video Conferencing Tools
      • 8.4 Jitsi Video Conferencing Tips
    • 9 How to Backup and Update Moodle
      • 9.1 Create a Moodle Site Backup System
      • 9.2 Set Up a Moodle Test Site
      • 9.3 Update Moodle on your Test Site
      • 9.4 Make a Custom Moodle Student Guide